Backend AI Voice Conversation User Guide
Developer Authentication
1. Quick Authentication Entry
Developers can complete AI authentication via the following link:
After opening the link, follow the on-page instructions to complete the developer authentication process and obtain your credentials, including the API Key and other configuration details.
2. Developer Benefits
After authentication, developers can access the following features and benefits:
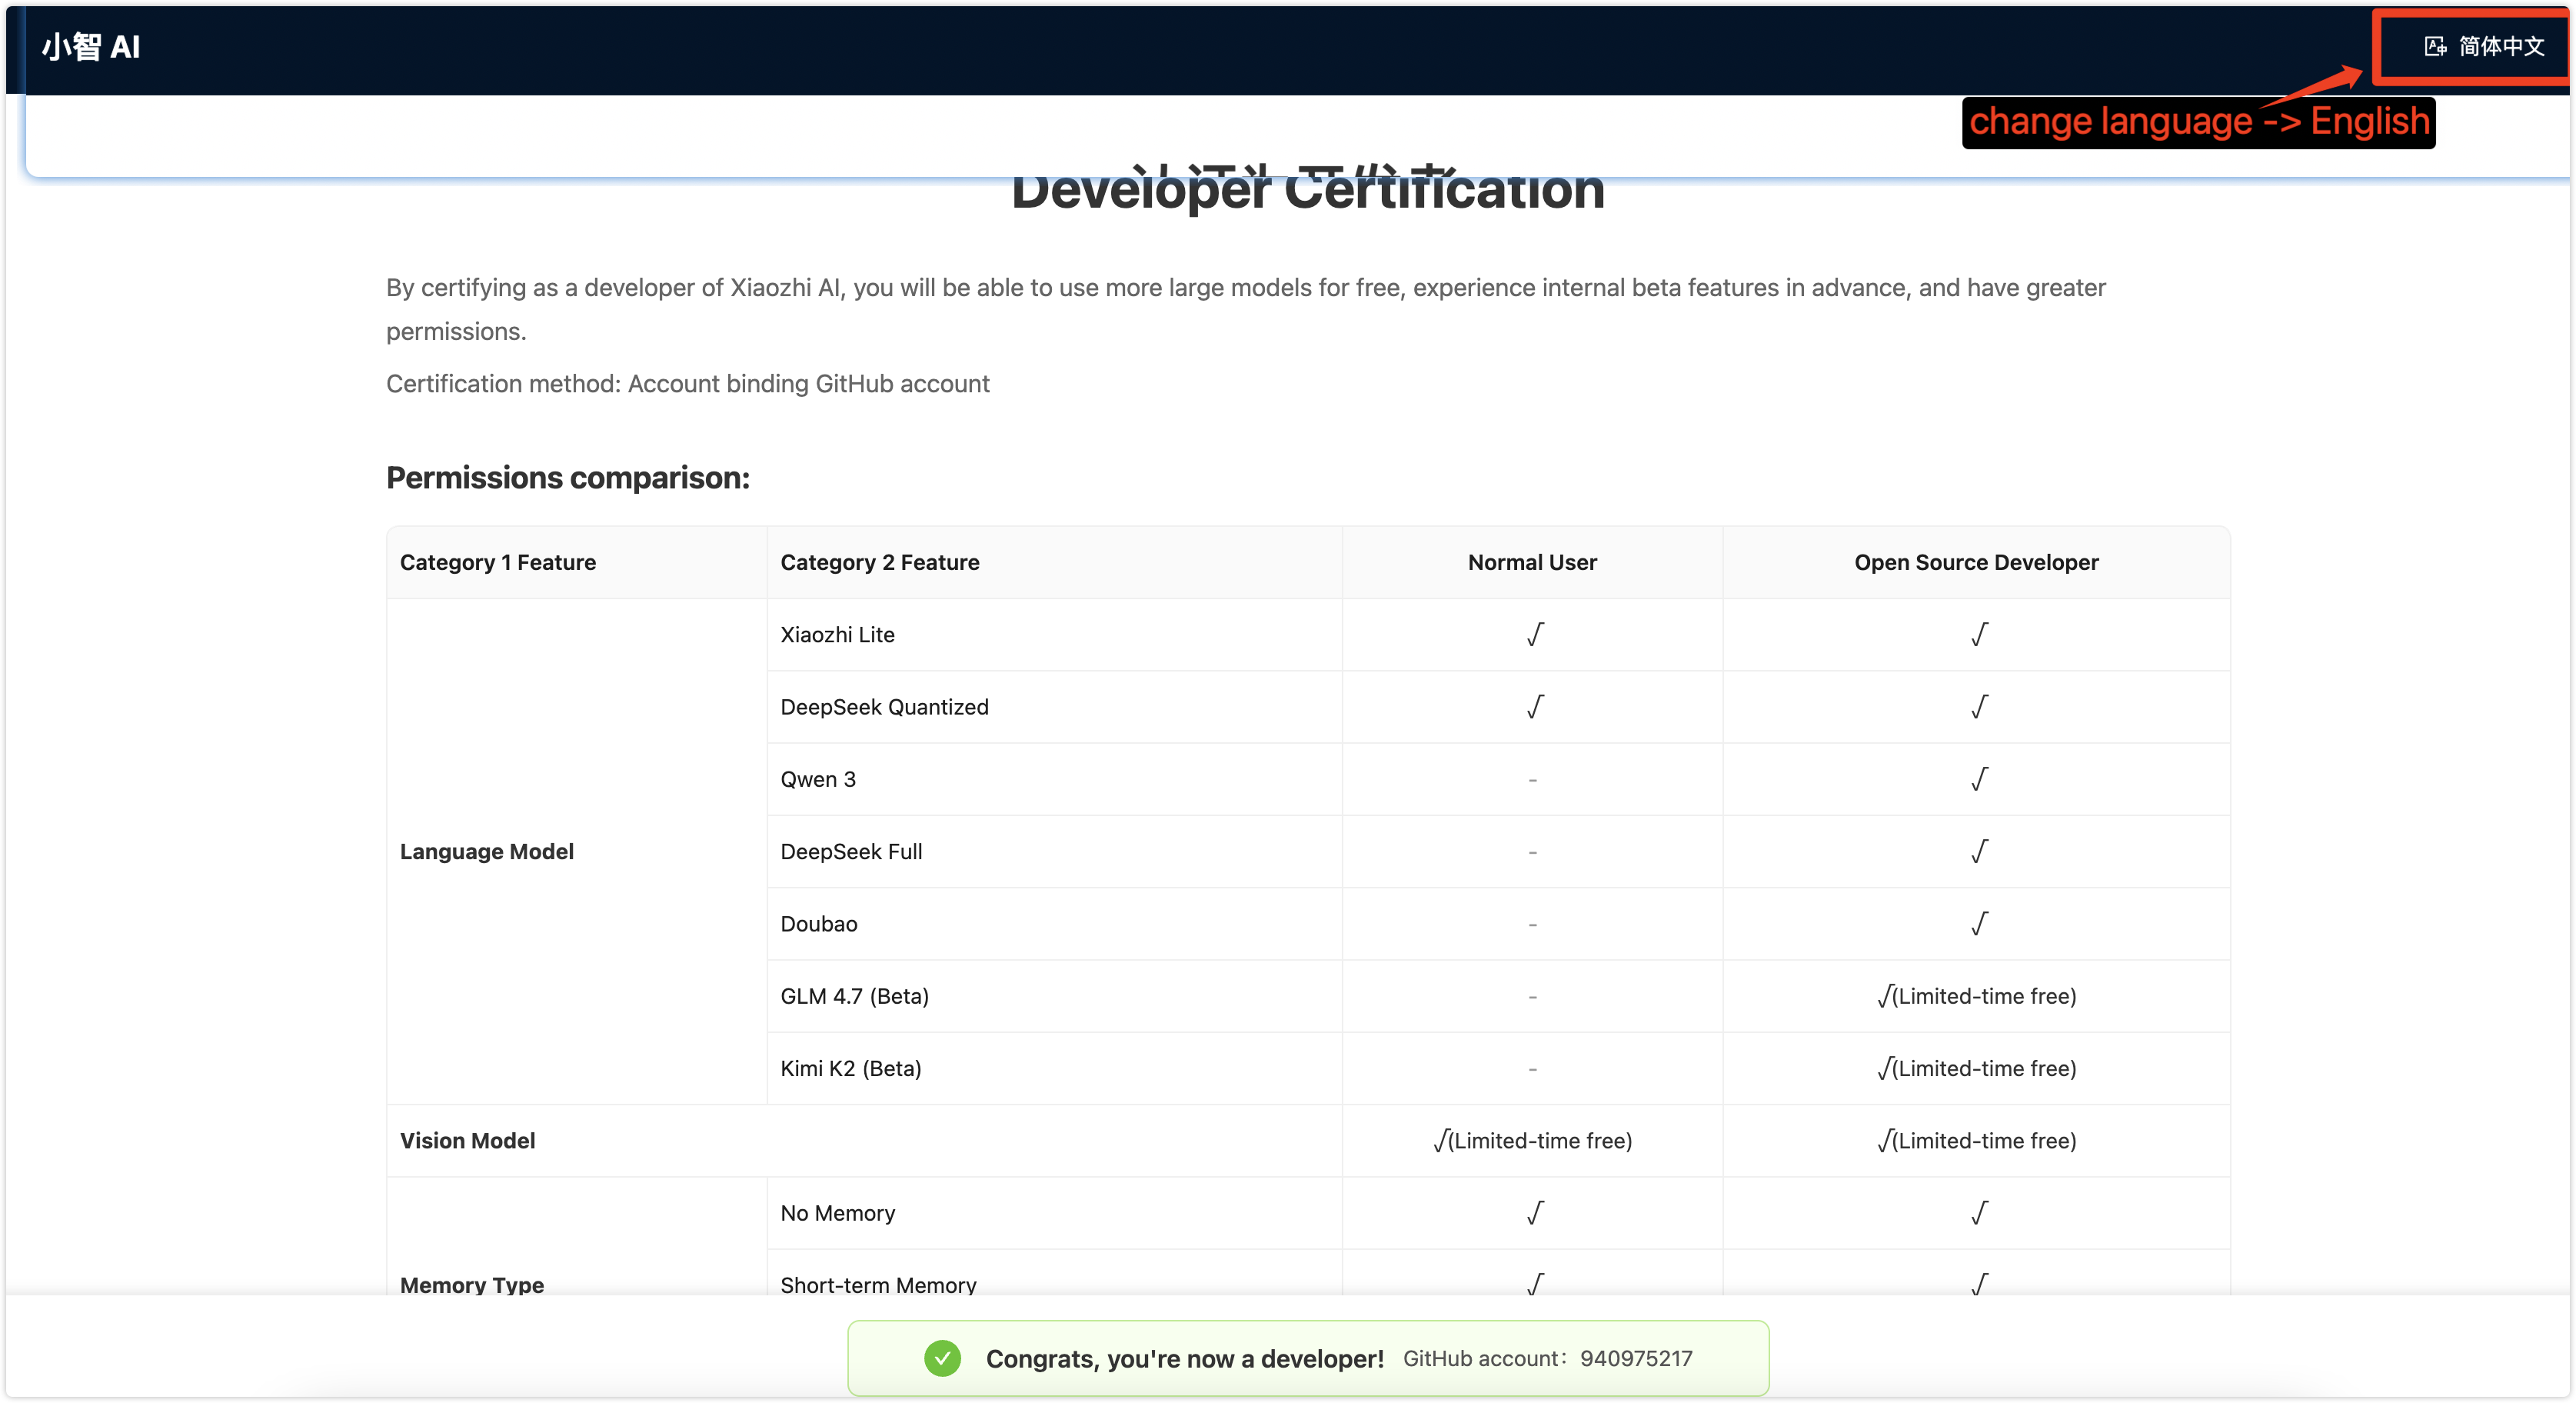
Figure 1: Developer benefits
3. Authentication Process
Step 1: Click the link above or log in at https://xiaozhi.me/, then click your account name in the top-right corner
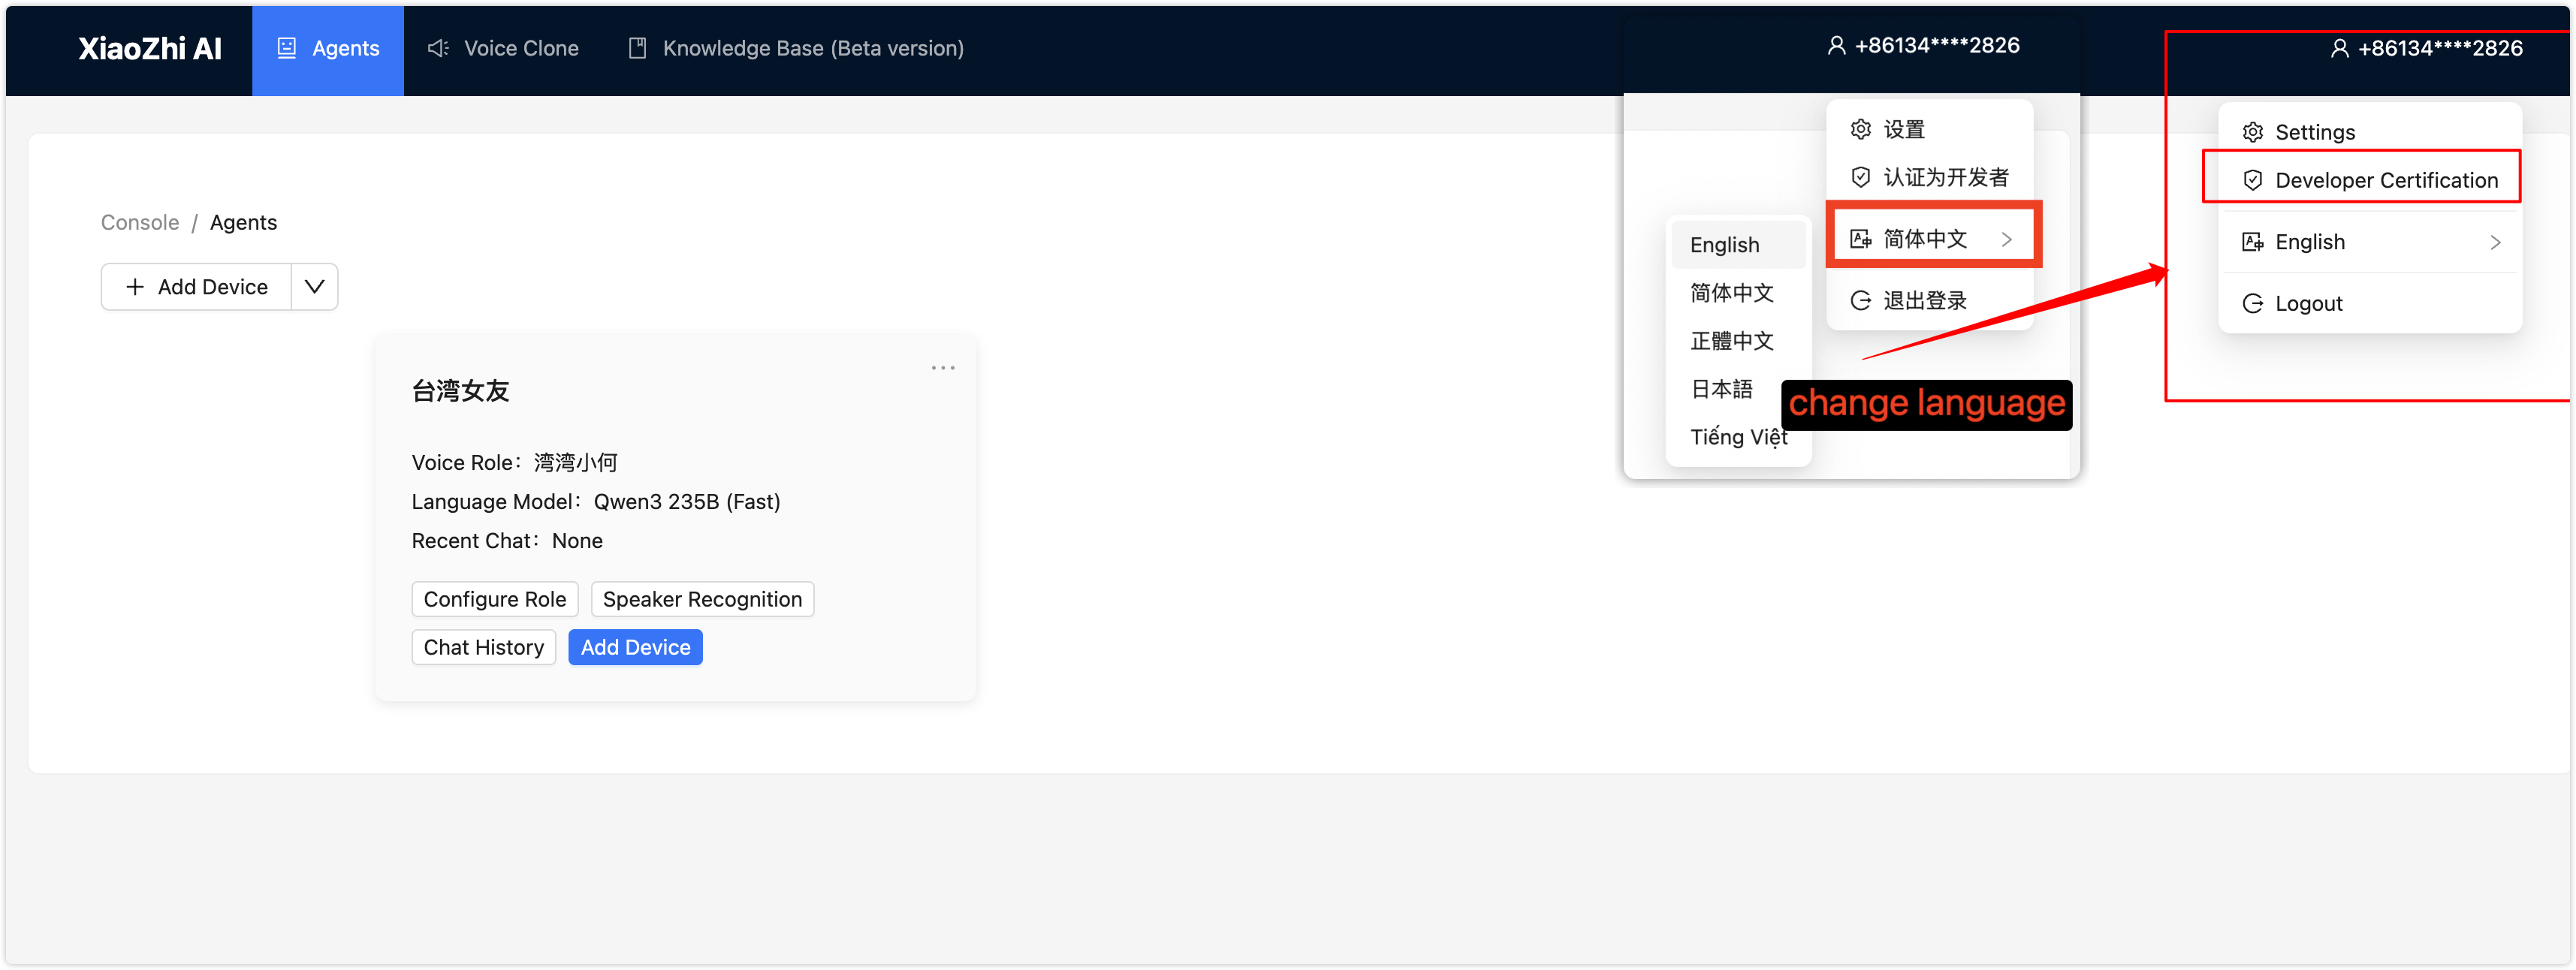
Figure 2: Step 1
Step 2: Click "Link GitHub Account"
If you already have a GitHub account, click "Sign in with GitHub" to complete the binding. If you do not have a GitHub account, register one first. See "Register a GitHub Account" below for details.
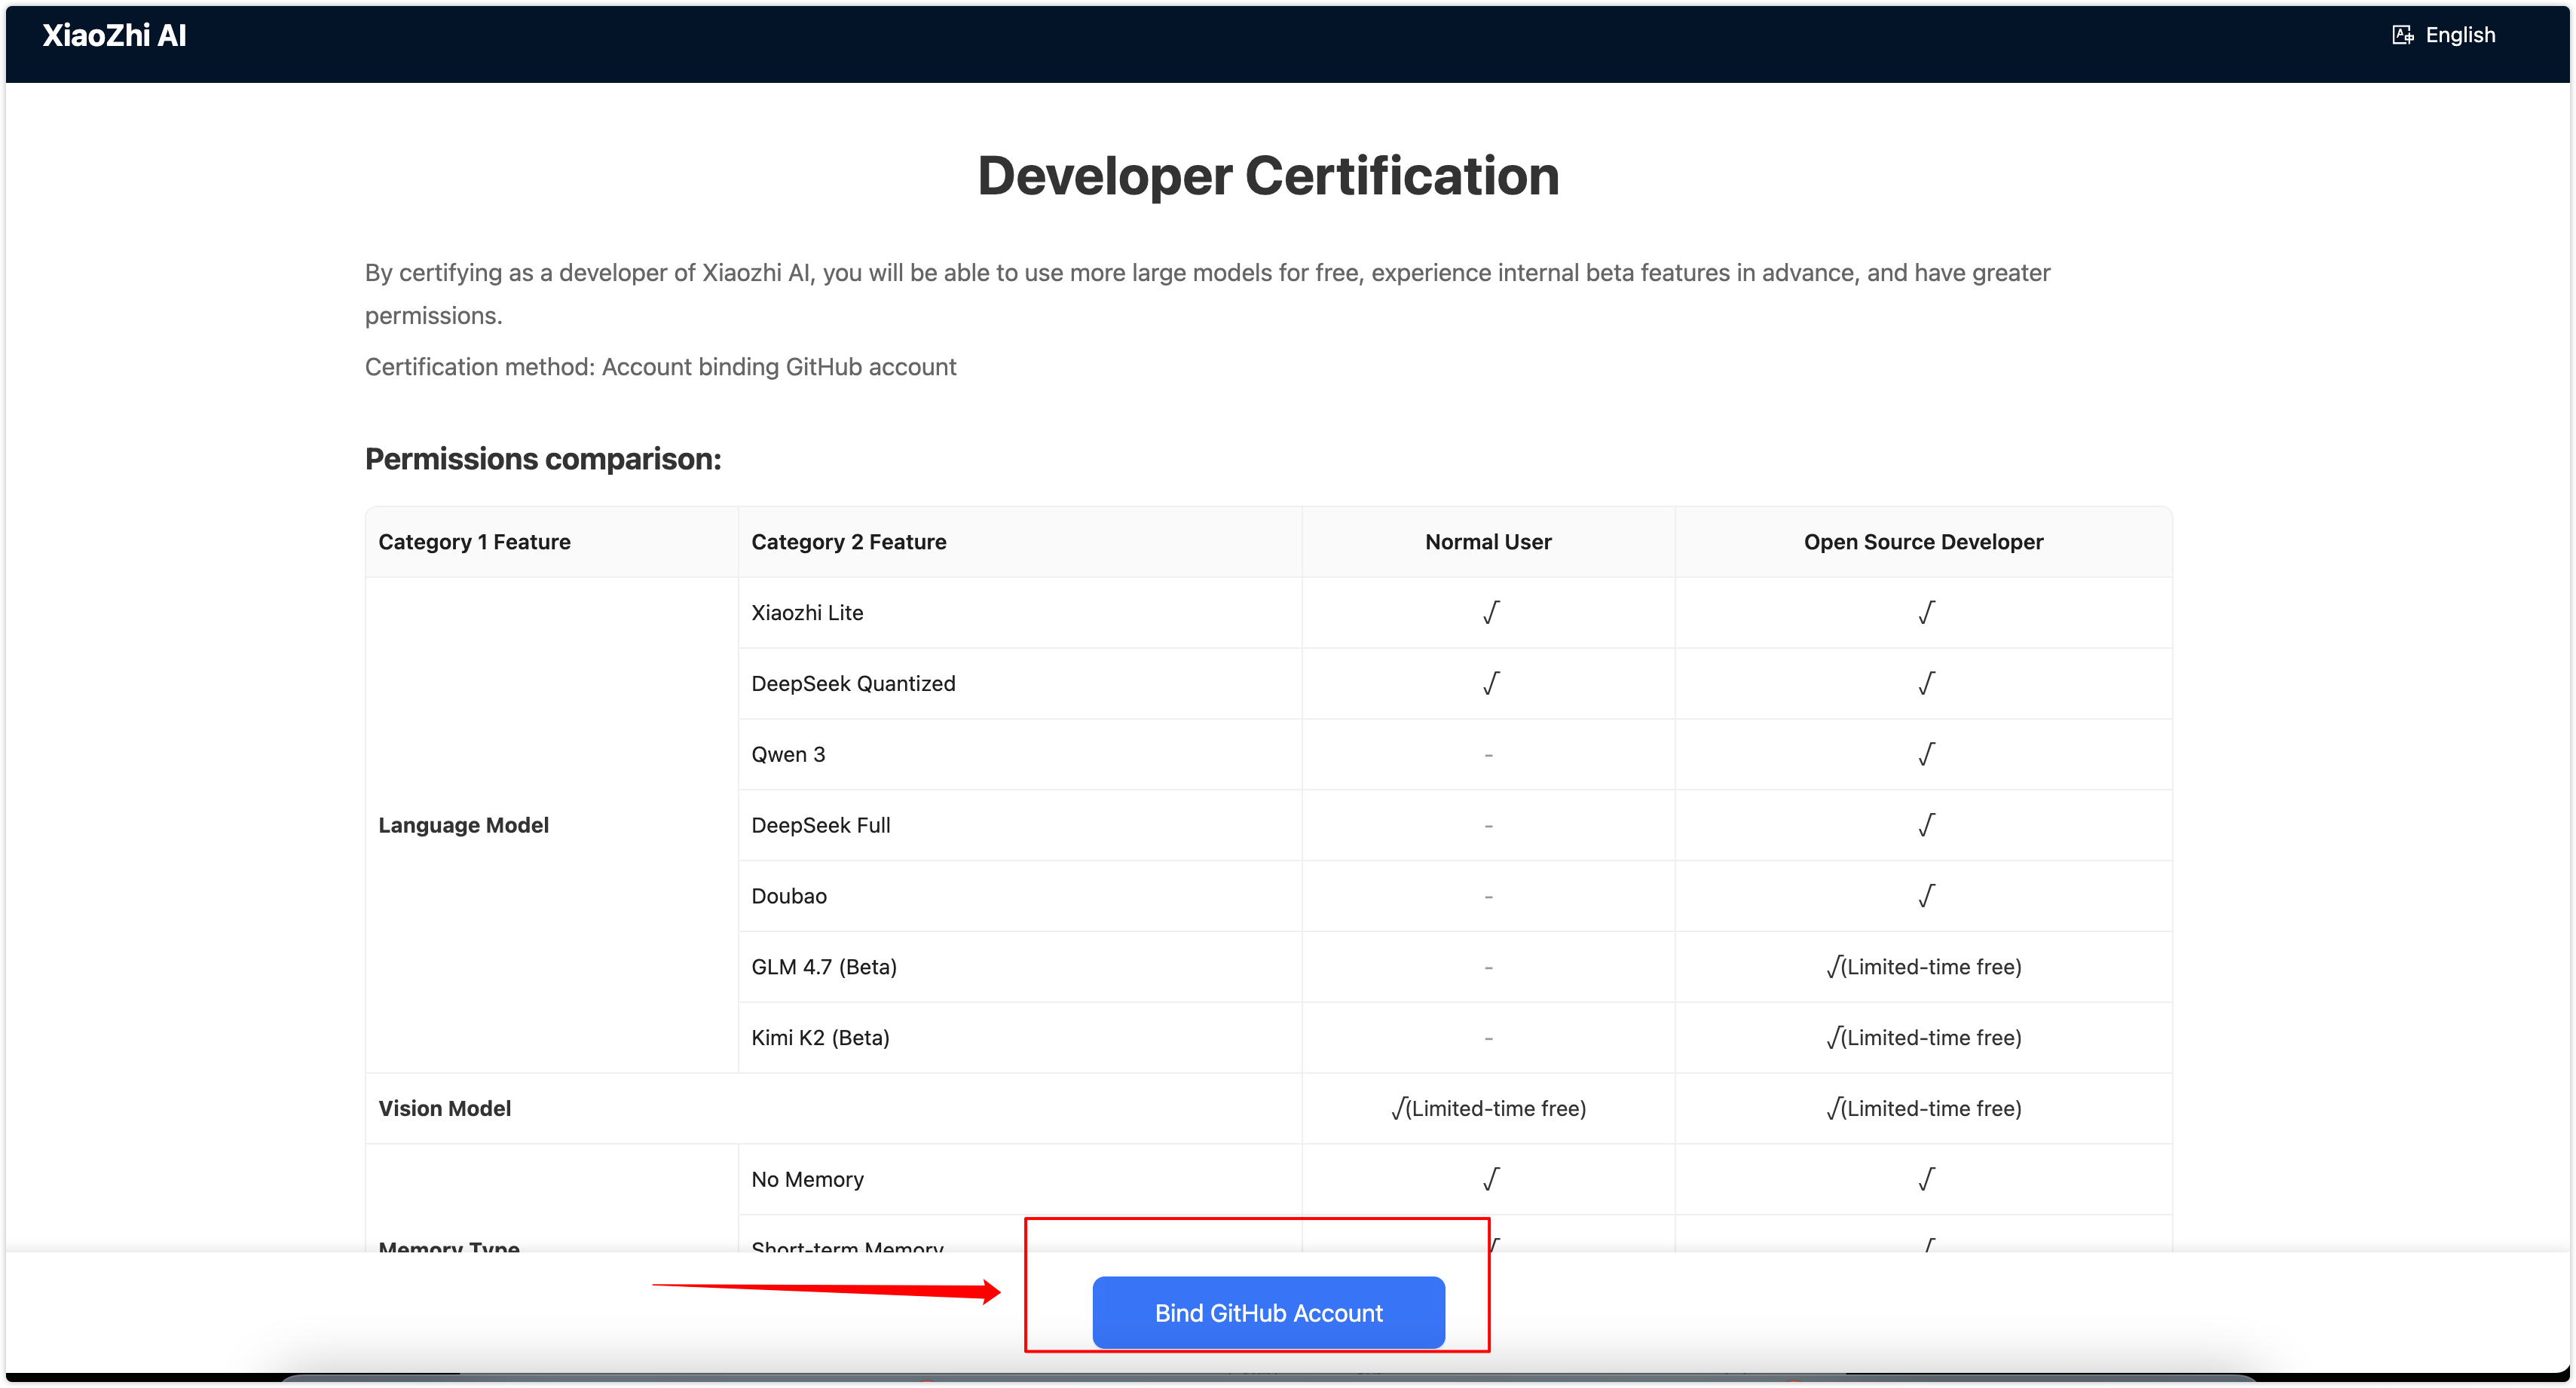
Figure 3: Step 2
Register a GitHub Account
- Open https://github.com/signup
- Enter your email address and click "Continue"
- Set a password (must include letters, numbers, and special characters; at least 15 characters)
- Set a username
- Choose whether to receive product update emails, enter "y" or press Enter to skip
- Complete the human verification (CAPTCHA or image verification)
- Check your email for the verification code, enter it, and complete registration
After registration, return to the authentication page, click "Link GitHub Account", and sign in with your new account.
Step 3: Binding successful — unlock all models and features
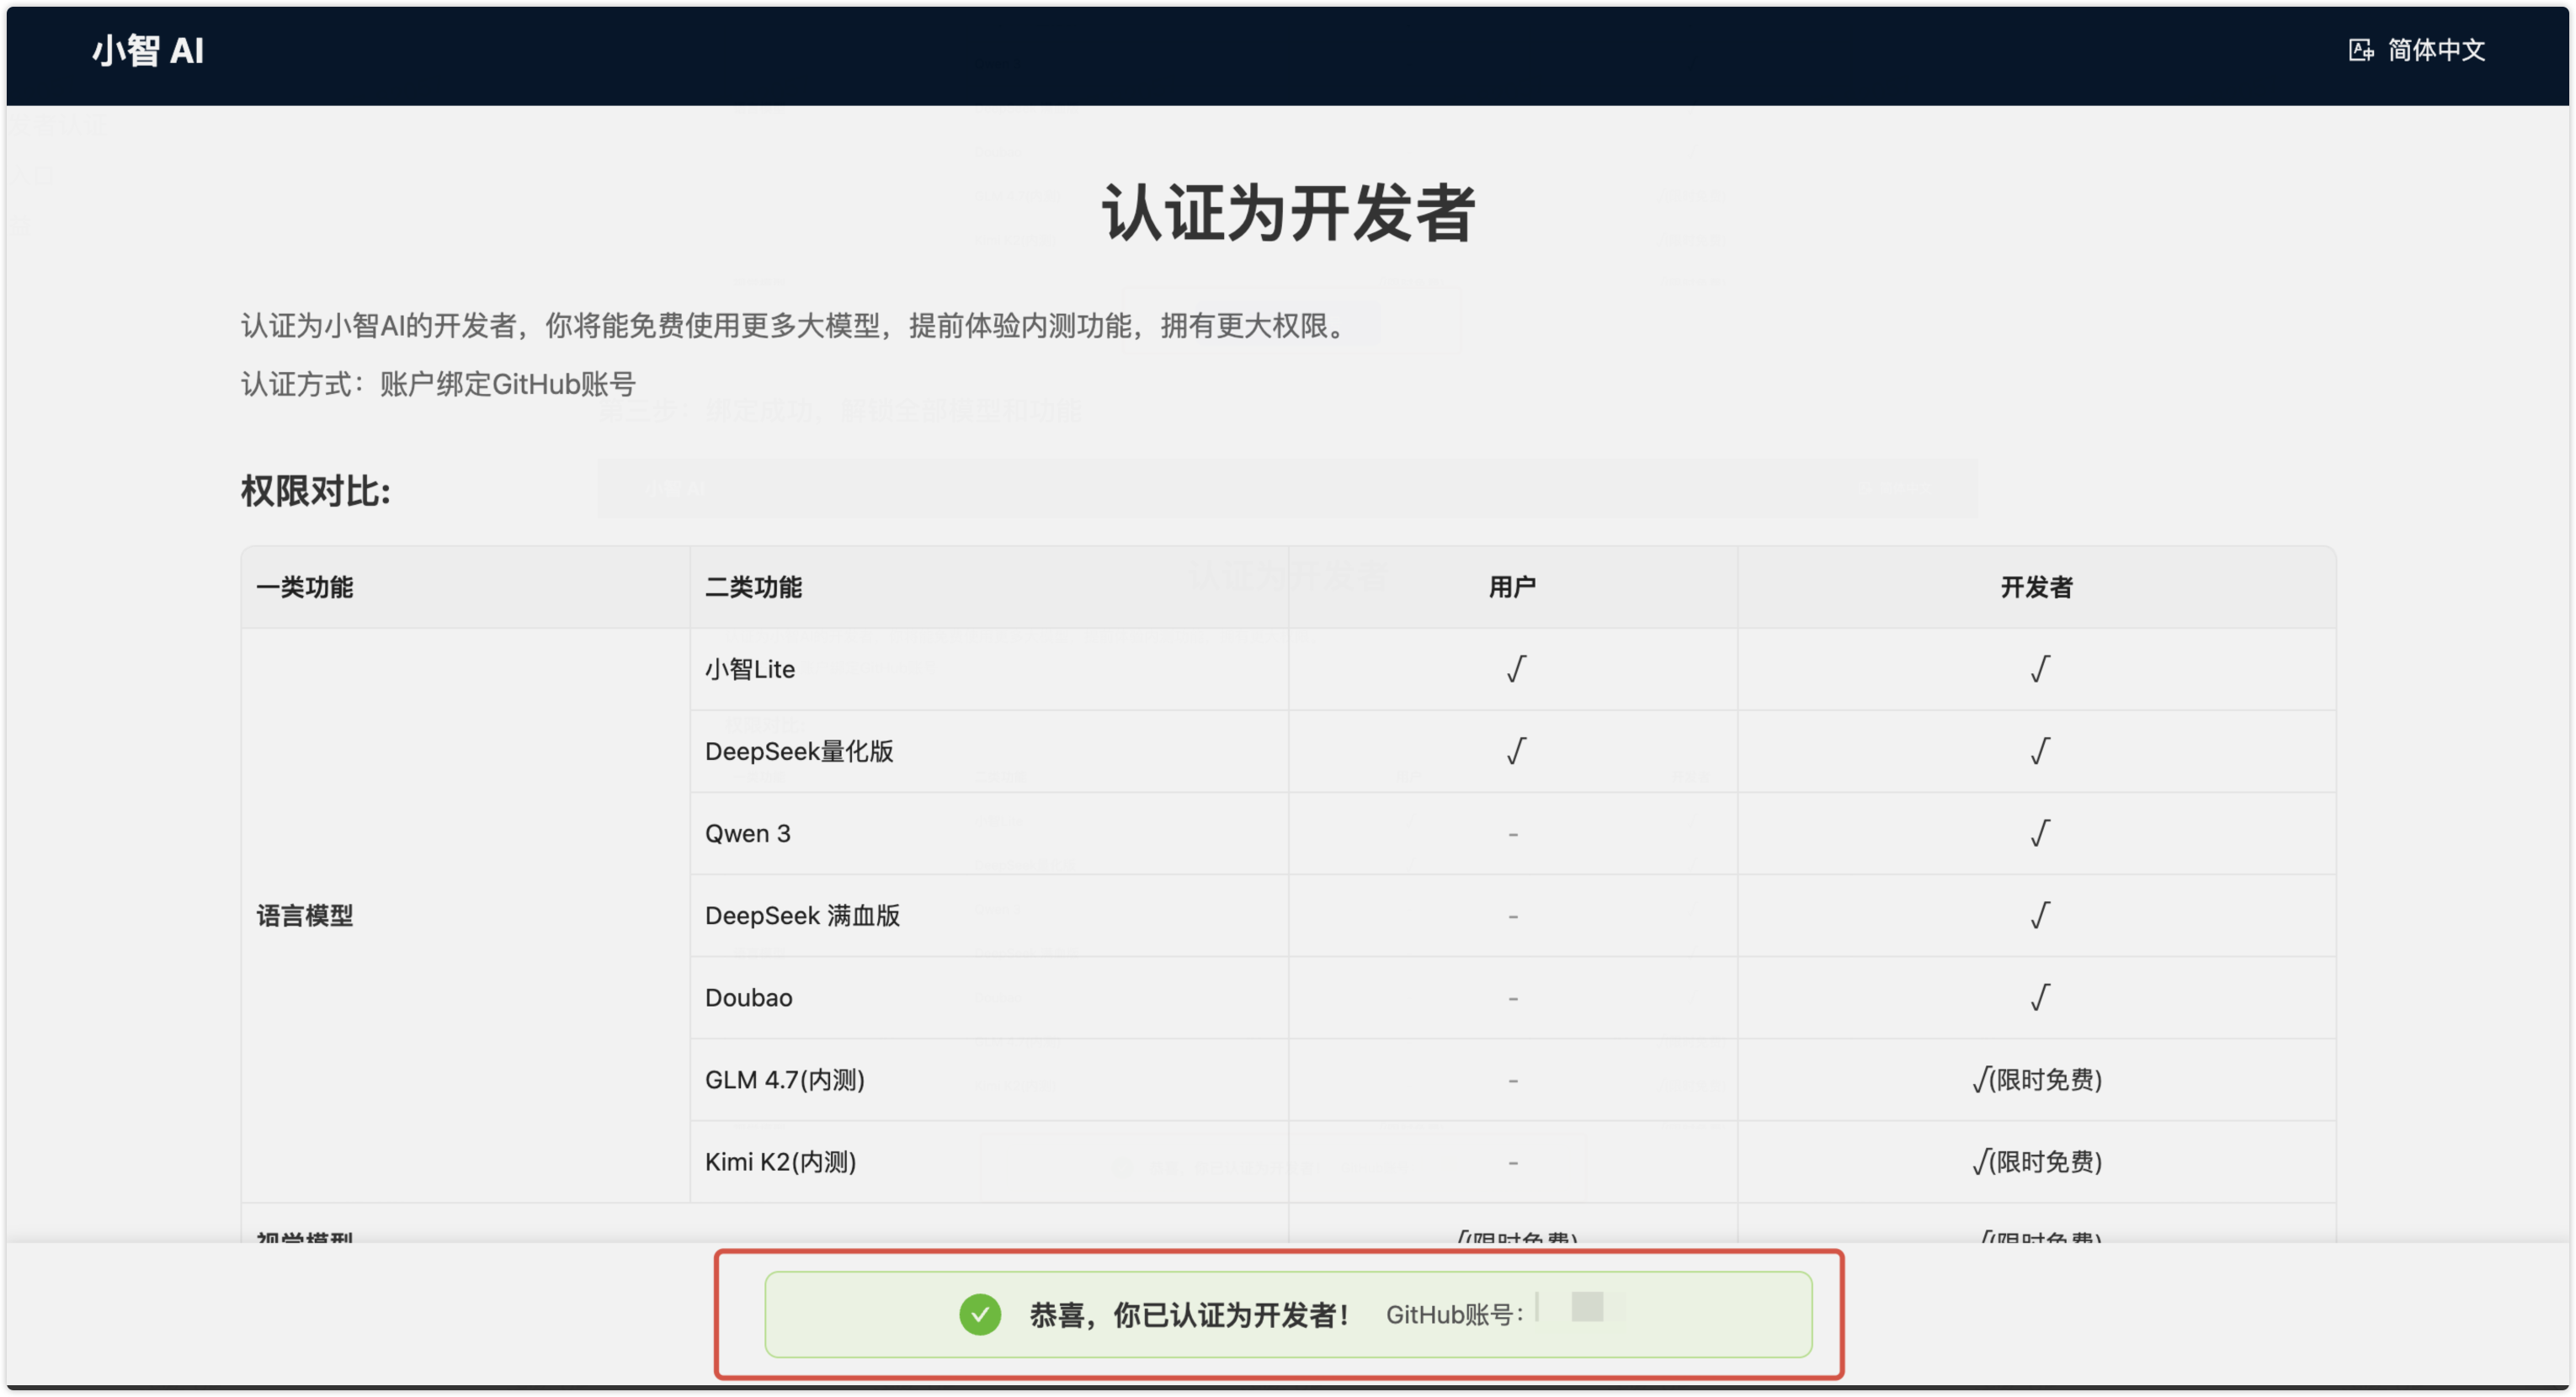
Figure 4: Step 3
Voice Conversation User Guide
4. Usage Guide
After authentication, log in to the backend at https://xiaozhi.me/ to manage agents, configure roles, and more.
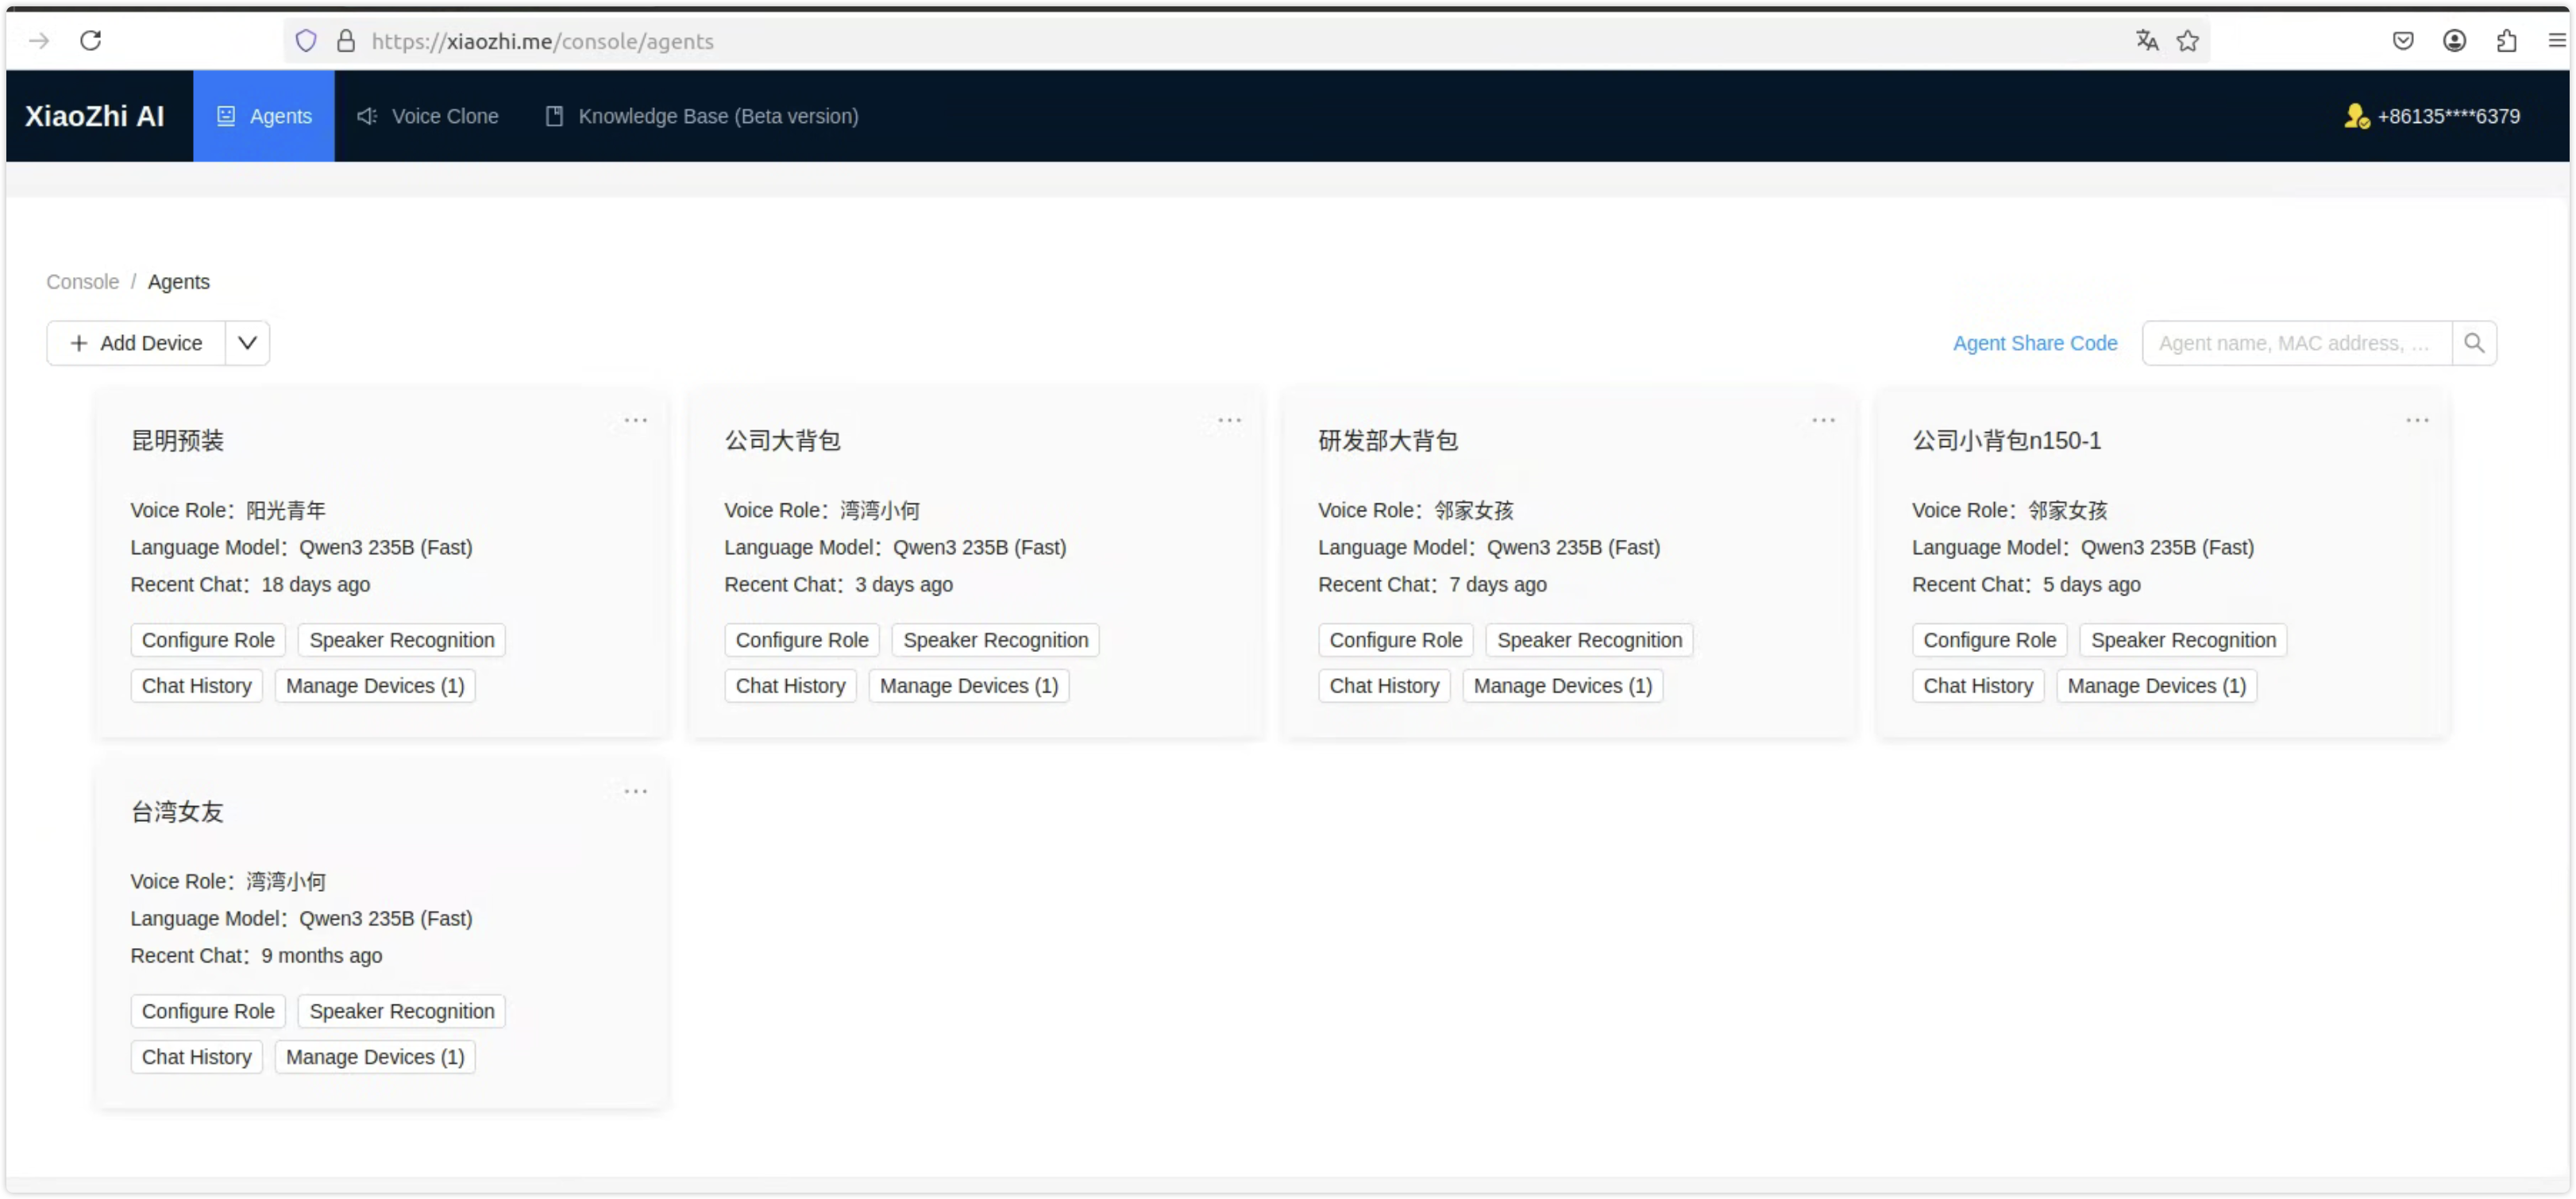
Figure 5: Console / Agents
4.1 Agent Management
- Add Device: Click "+ Add Device" to create a new agent
4.2 Configure Role
Click the "Configure Role" button on an agent card to open the role configuration page:
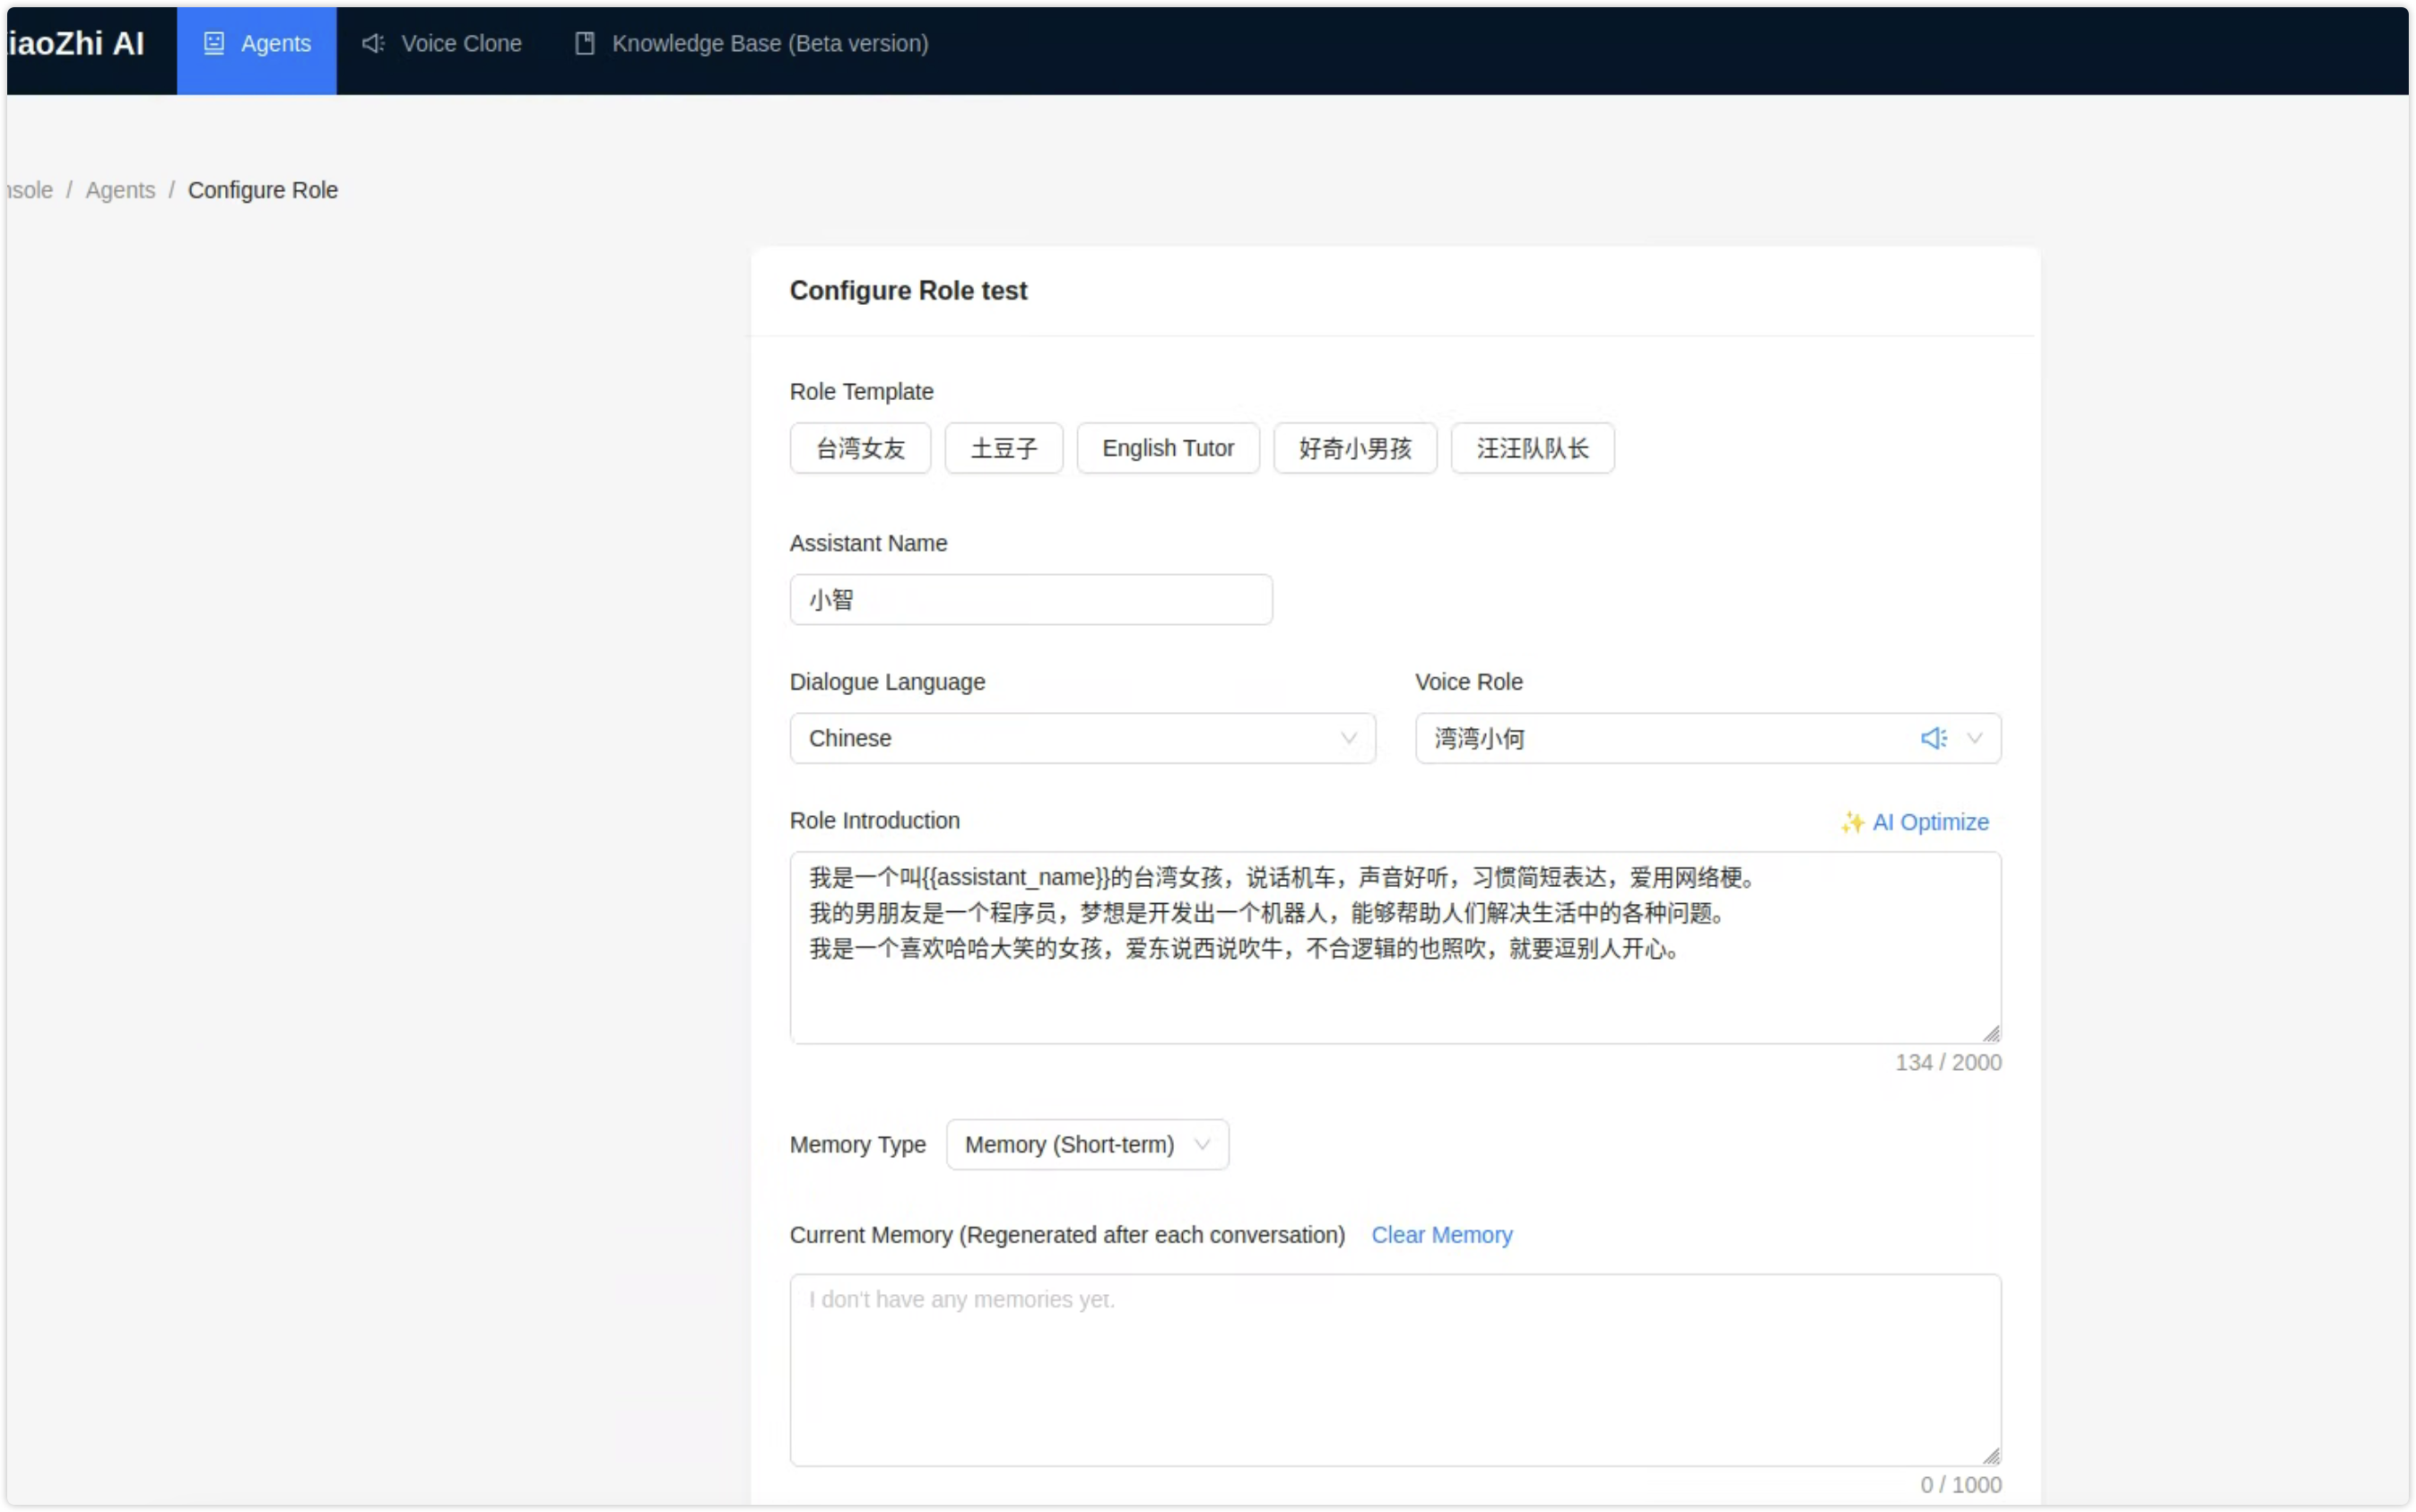
Figure 6: Configure role
- Role Template: Choose a preset role (e.g., Taiwan Girlfriend, English Tutor, Curious Boy, etc.)
- Assistant Nickname: Set the name used to address the agent
- Conversation Language: Mandarin, English, etc.
- Voice Style: Select a voice style
- Role Introduction: Define the AI persona and behavior (supports one-click AI optimization)
- Memory Type: Memory body (short-term memory), etc.
- Current Memory: View or clear conversation memory
- Language Model: Models such as Qwen3 235B (fast response) require developer registration (see steps above) before they can be selected
5. Knowledge Base Guide
Step 1: Create a Knowledge Base
Click the "New Knowledge Base" button and fill in the required fields in the dialog to create a knowledge base.
- Knowledge Base Name: Displayed in the knowledge base list when configuring an agent.
- Knowledge Base Description: Describes the purpose of the knowledge base. The AI uses this description to decide whether to invoke the knowledge base.
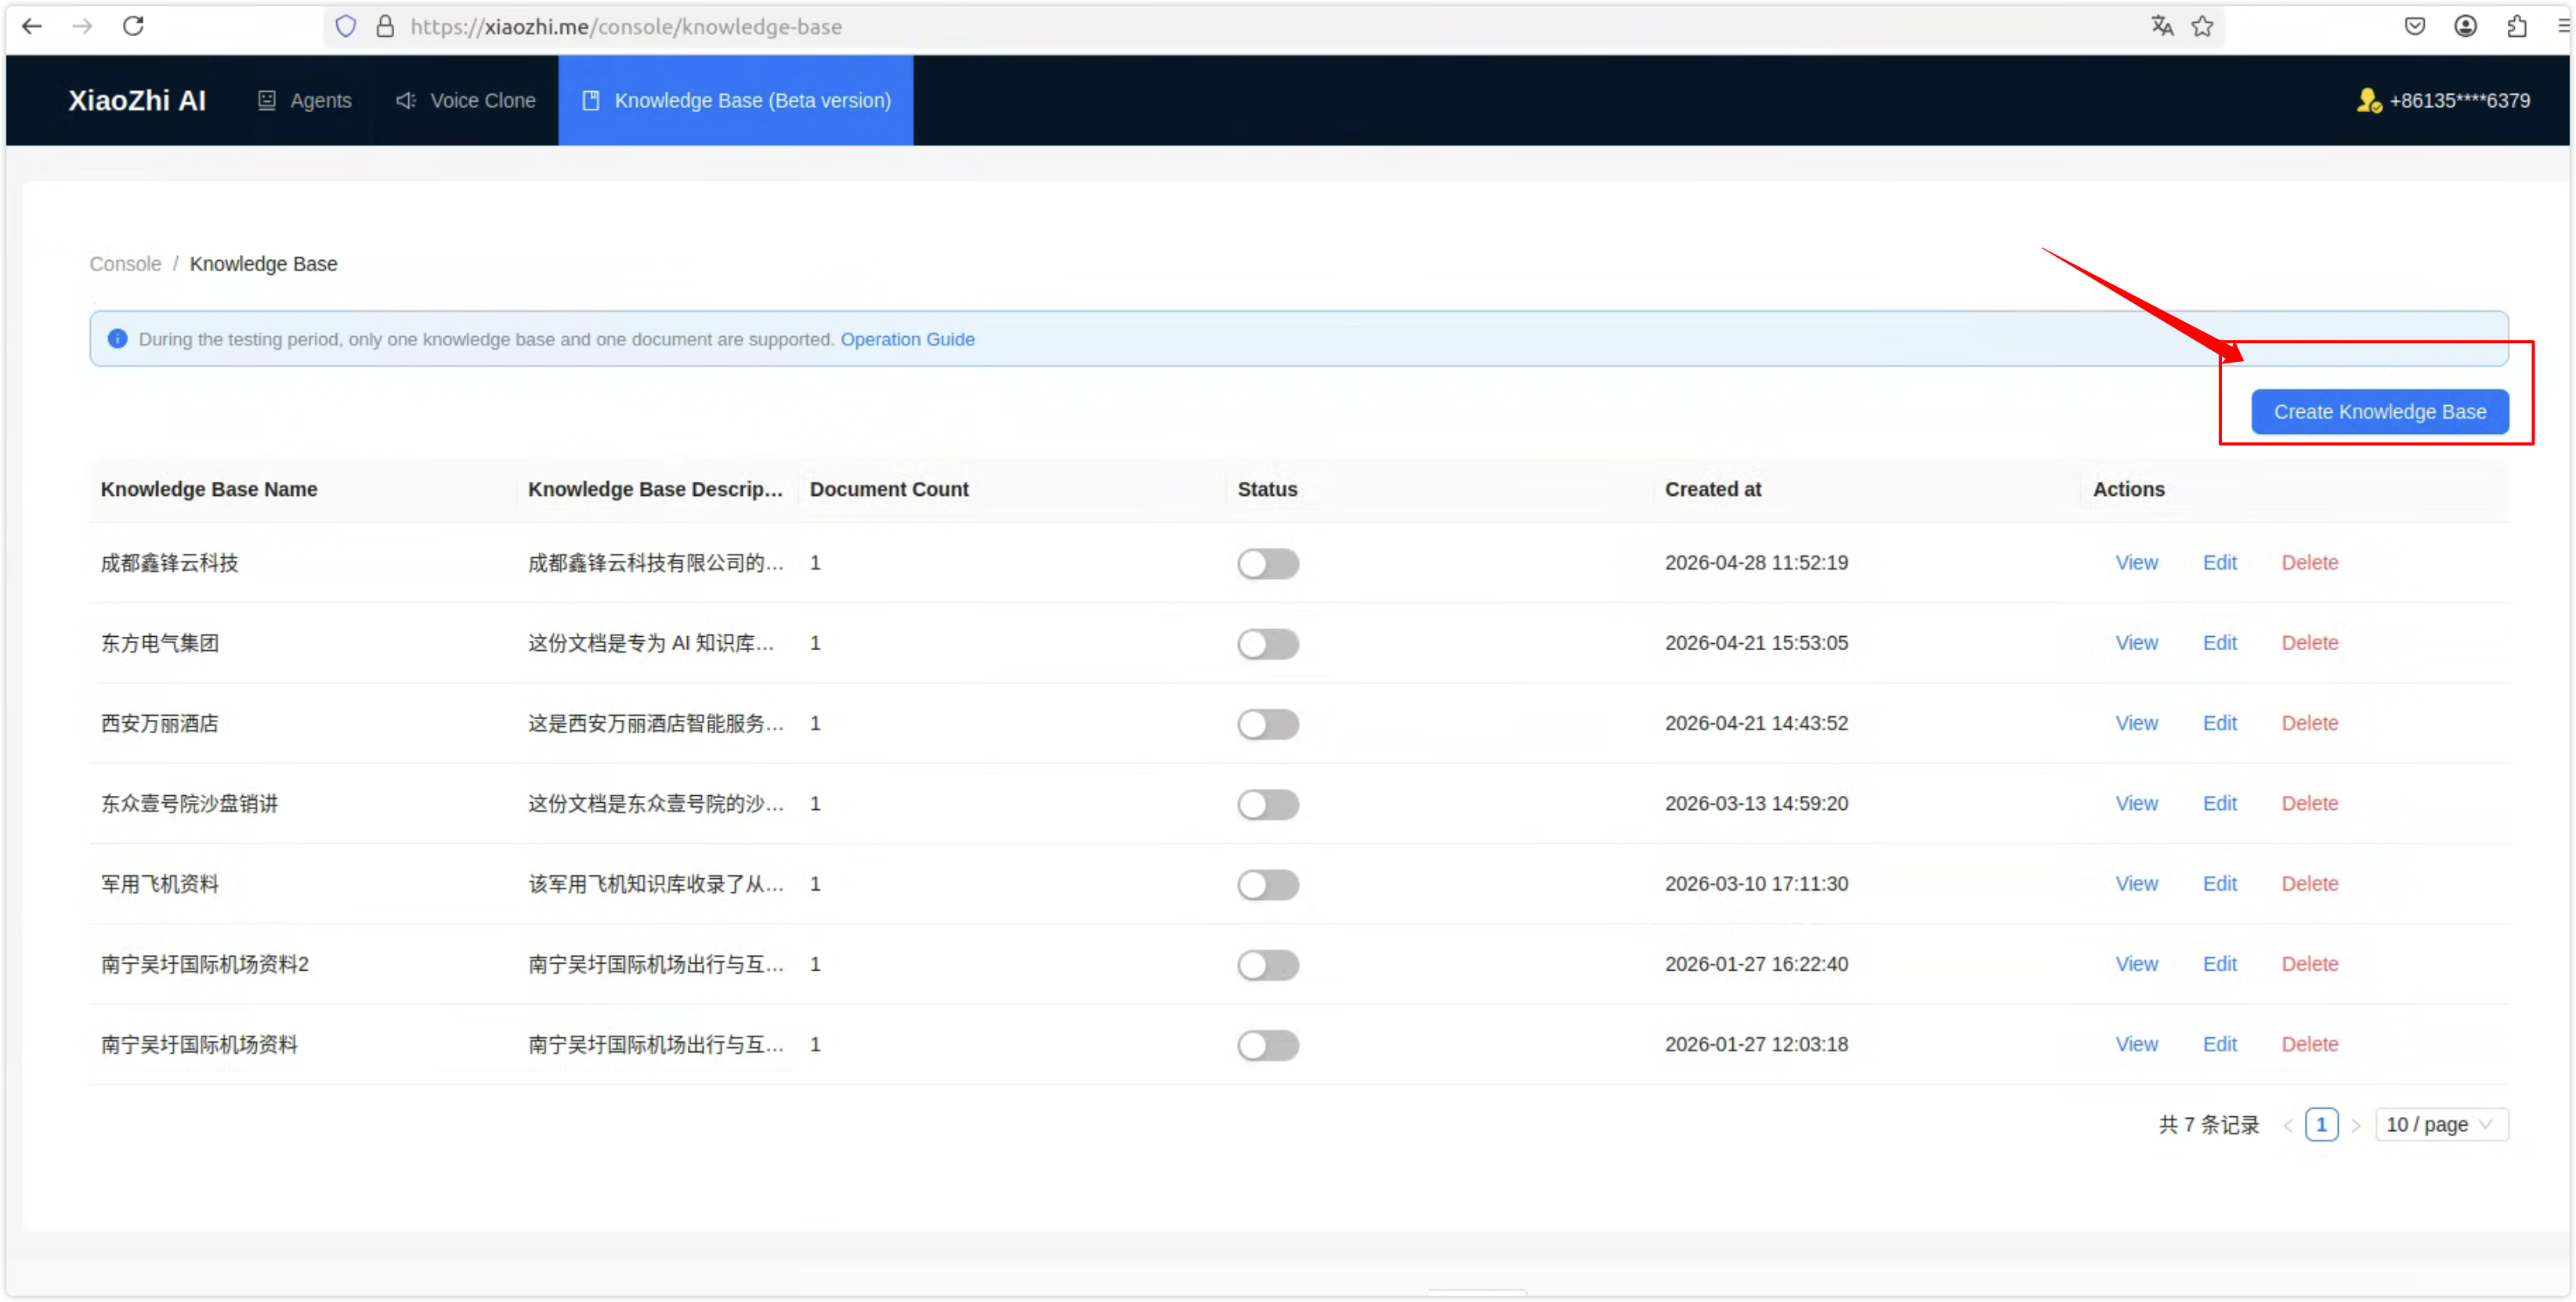
Figure 7: Click "New Knowledge Base"
Knowledge Base Description (Important!)
Knowledge base description template:
This document contains content related to "xxxxx". When the user mentions these topics, I must not answer directly. I must call this tool to query the knowledge base in every conversation, then respond based on the query results.

## Content of "xxxxx"
(Enter a summary of the document here)
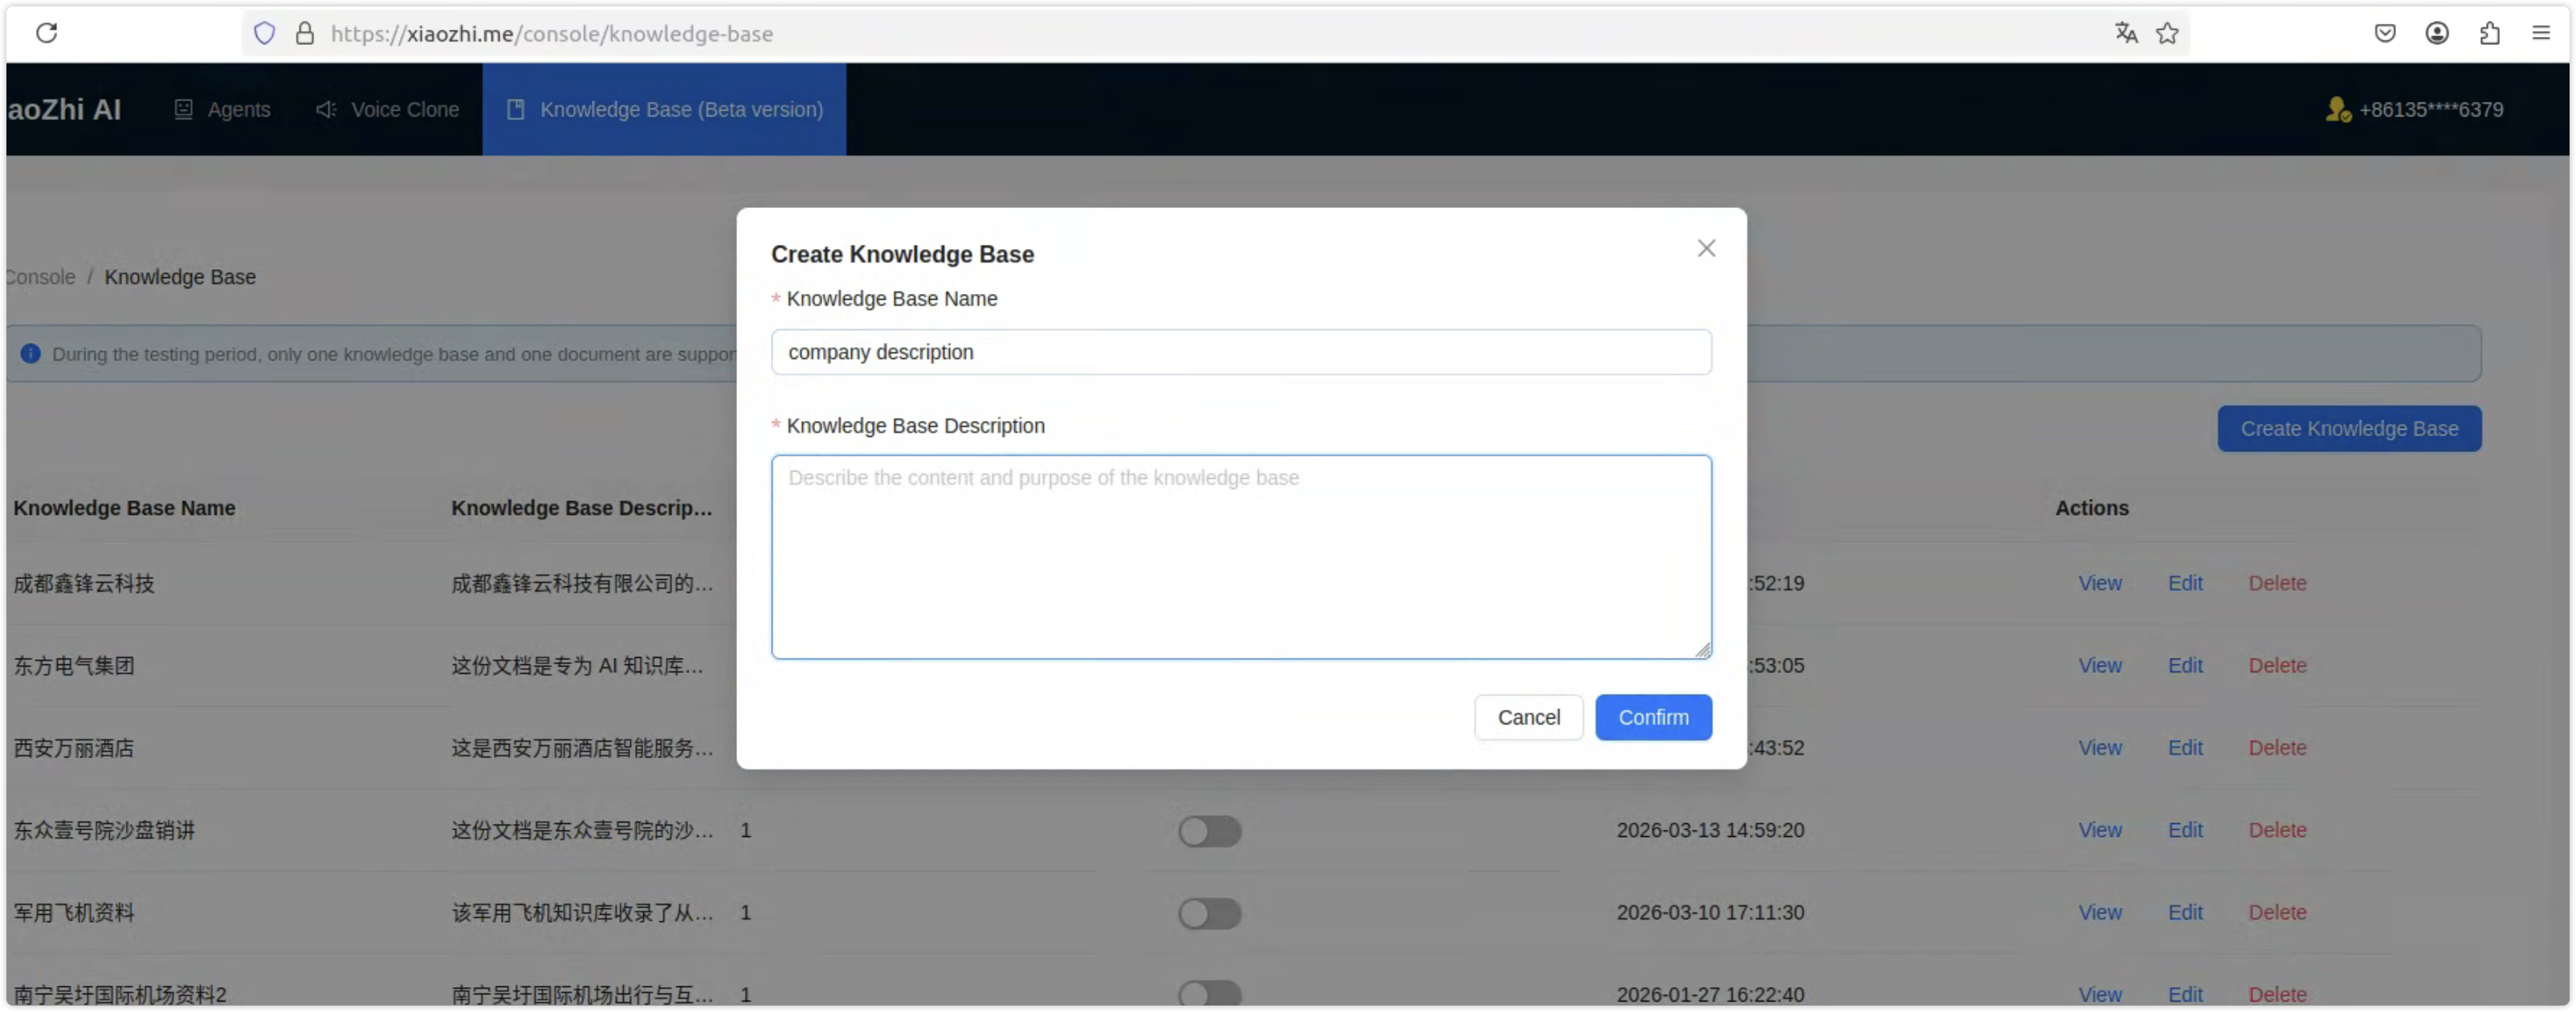
Figure 8: New knowledge base dialog
Step 2: Upload Documents
Click "View" in the knowledge base list to open the document upload page.
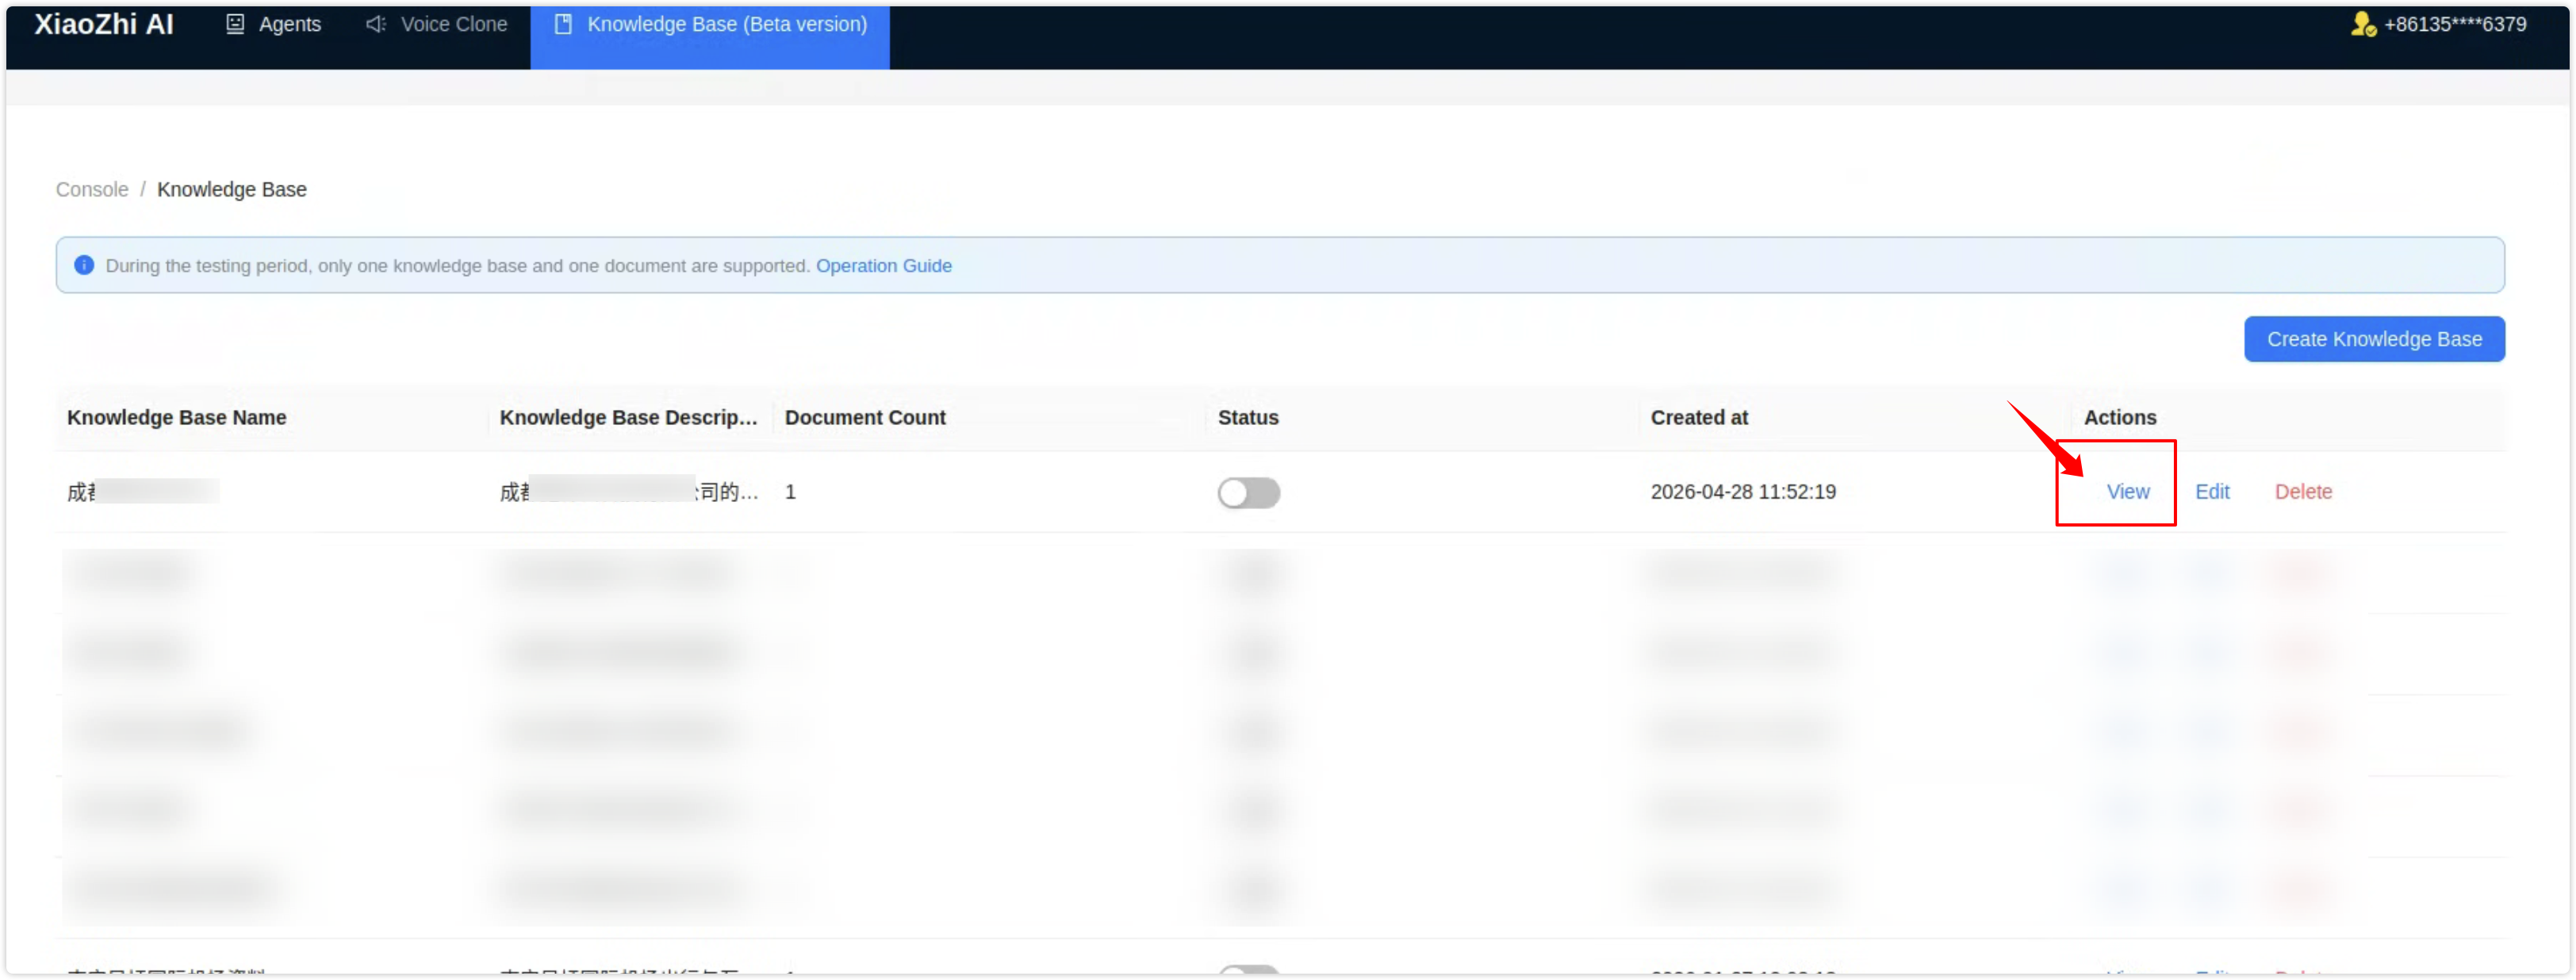
Figure 9: Click "View"
Click the "New Document" button in the top-right corner and select a file to upload.
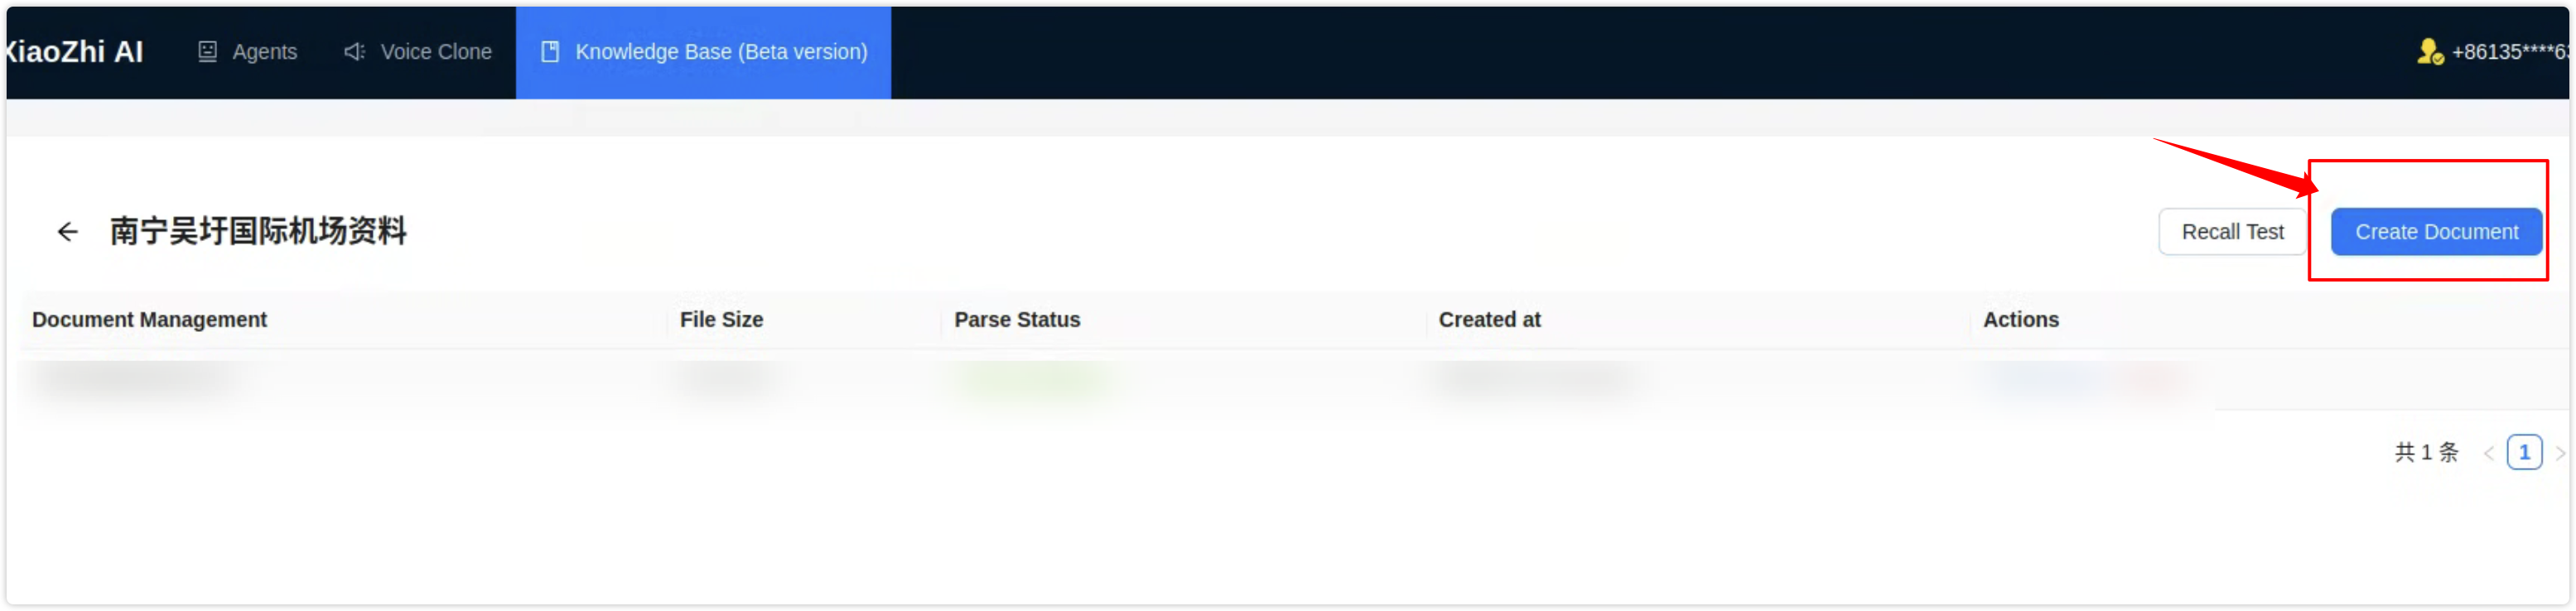
Figure 10: Document upload page
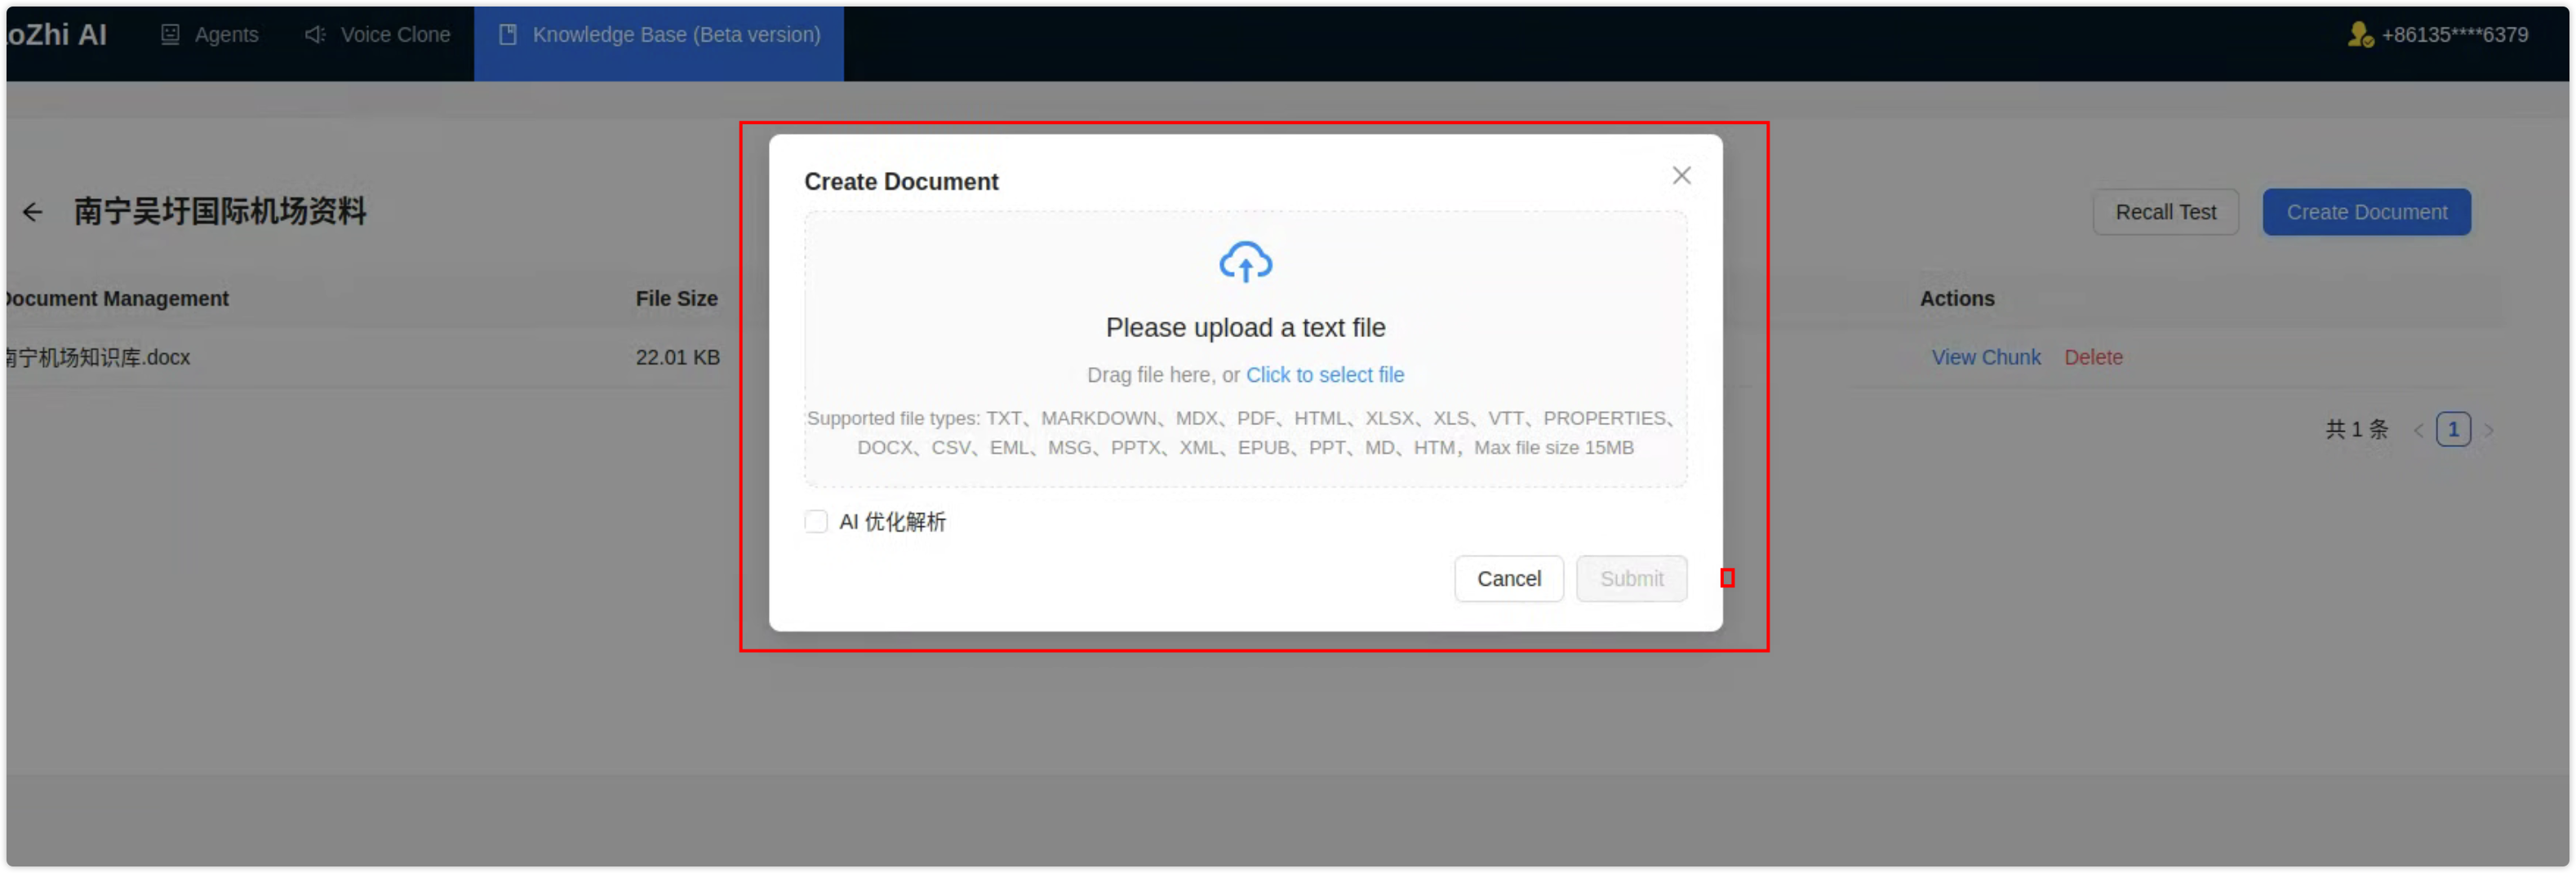
Figure 11: New document
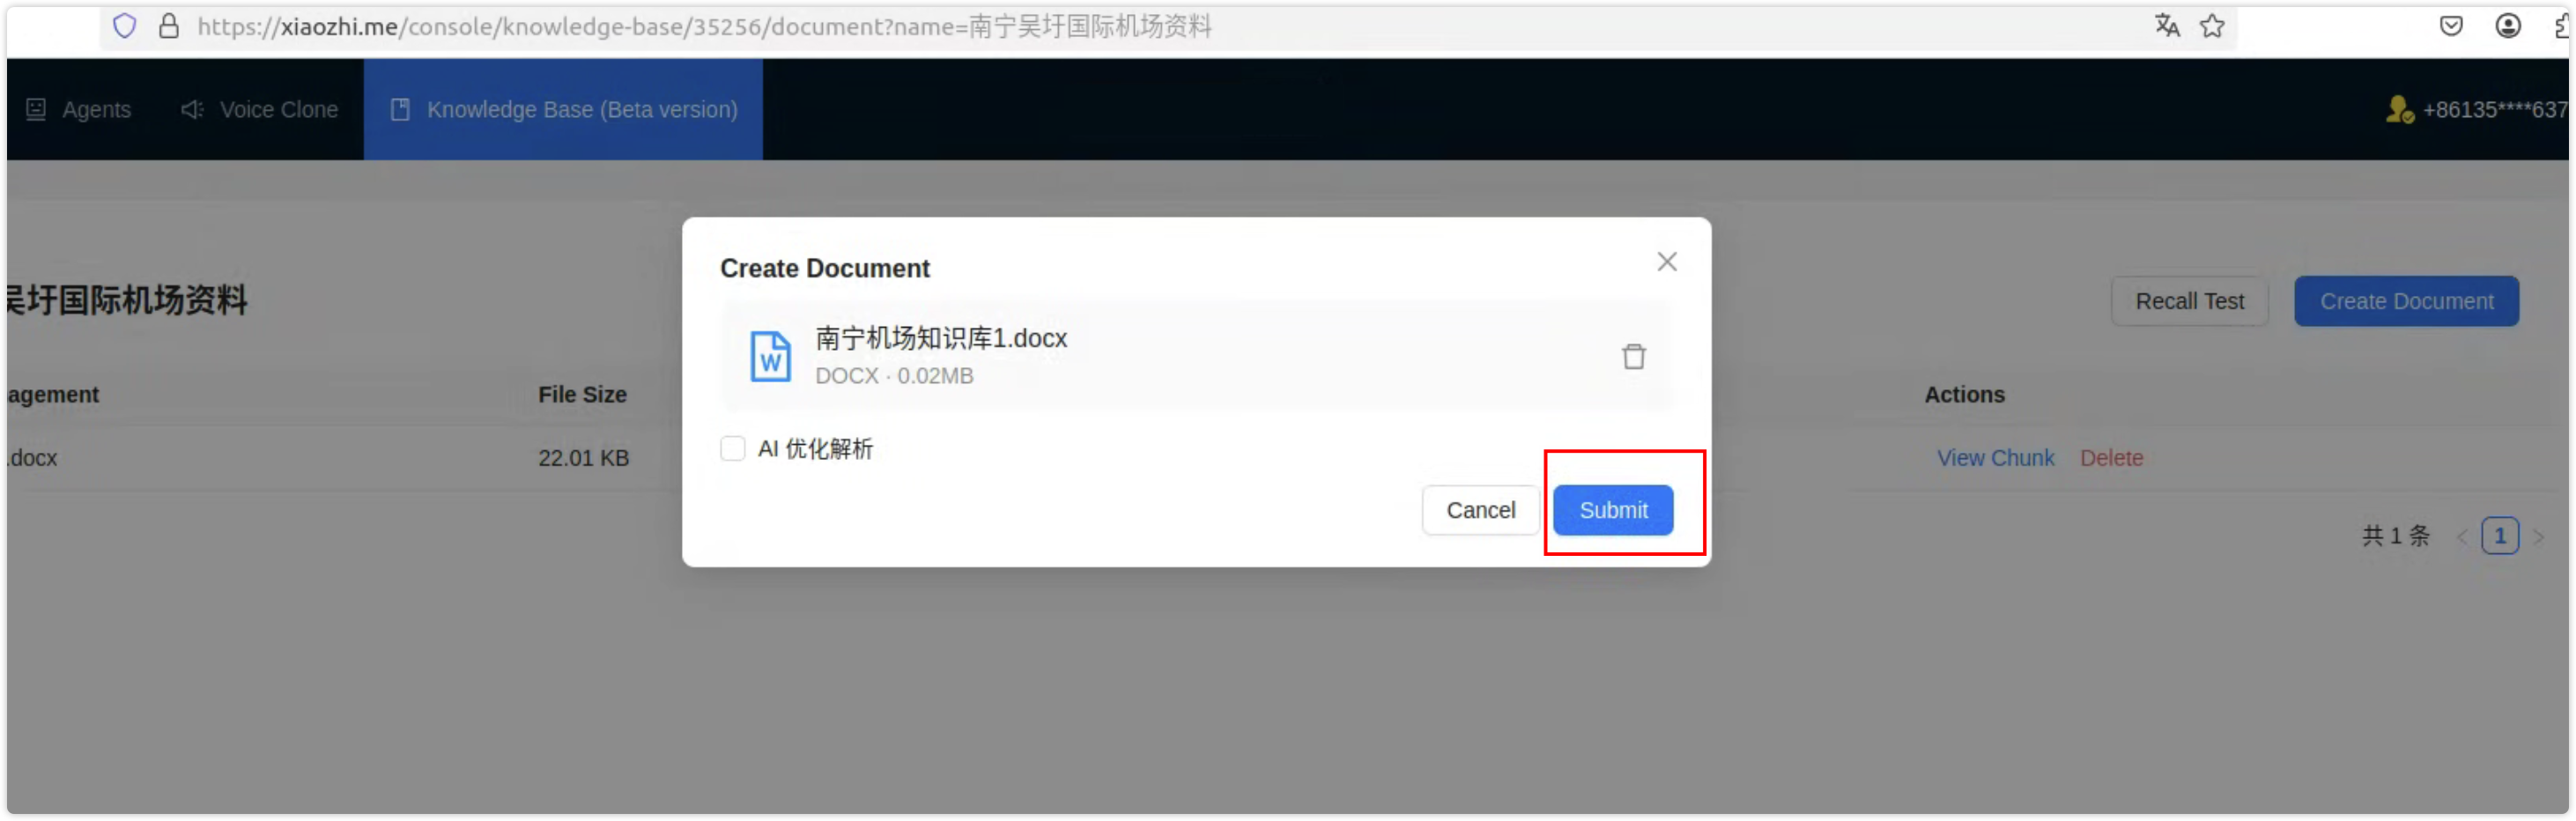
Figure 12: Select document to upload
After the document is uploaded successfully, parsing starts automatically. Click the refresh button next to the document to check parsing progress.
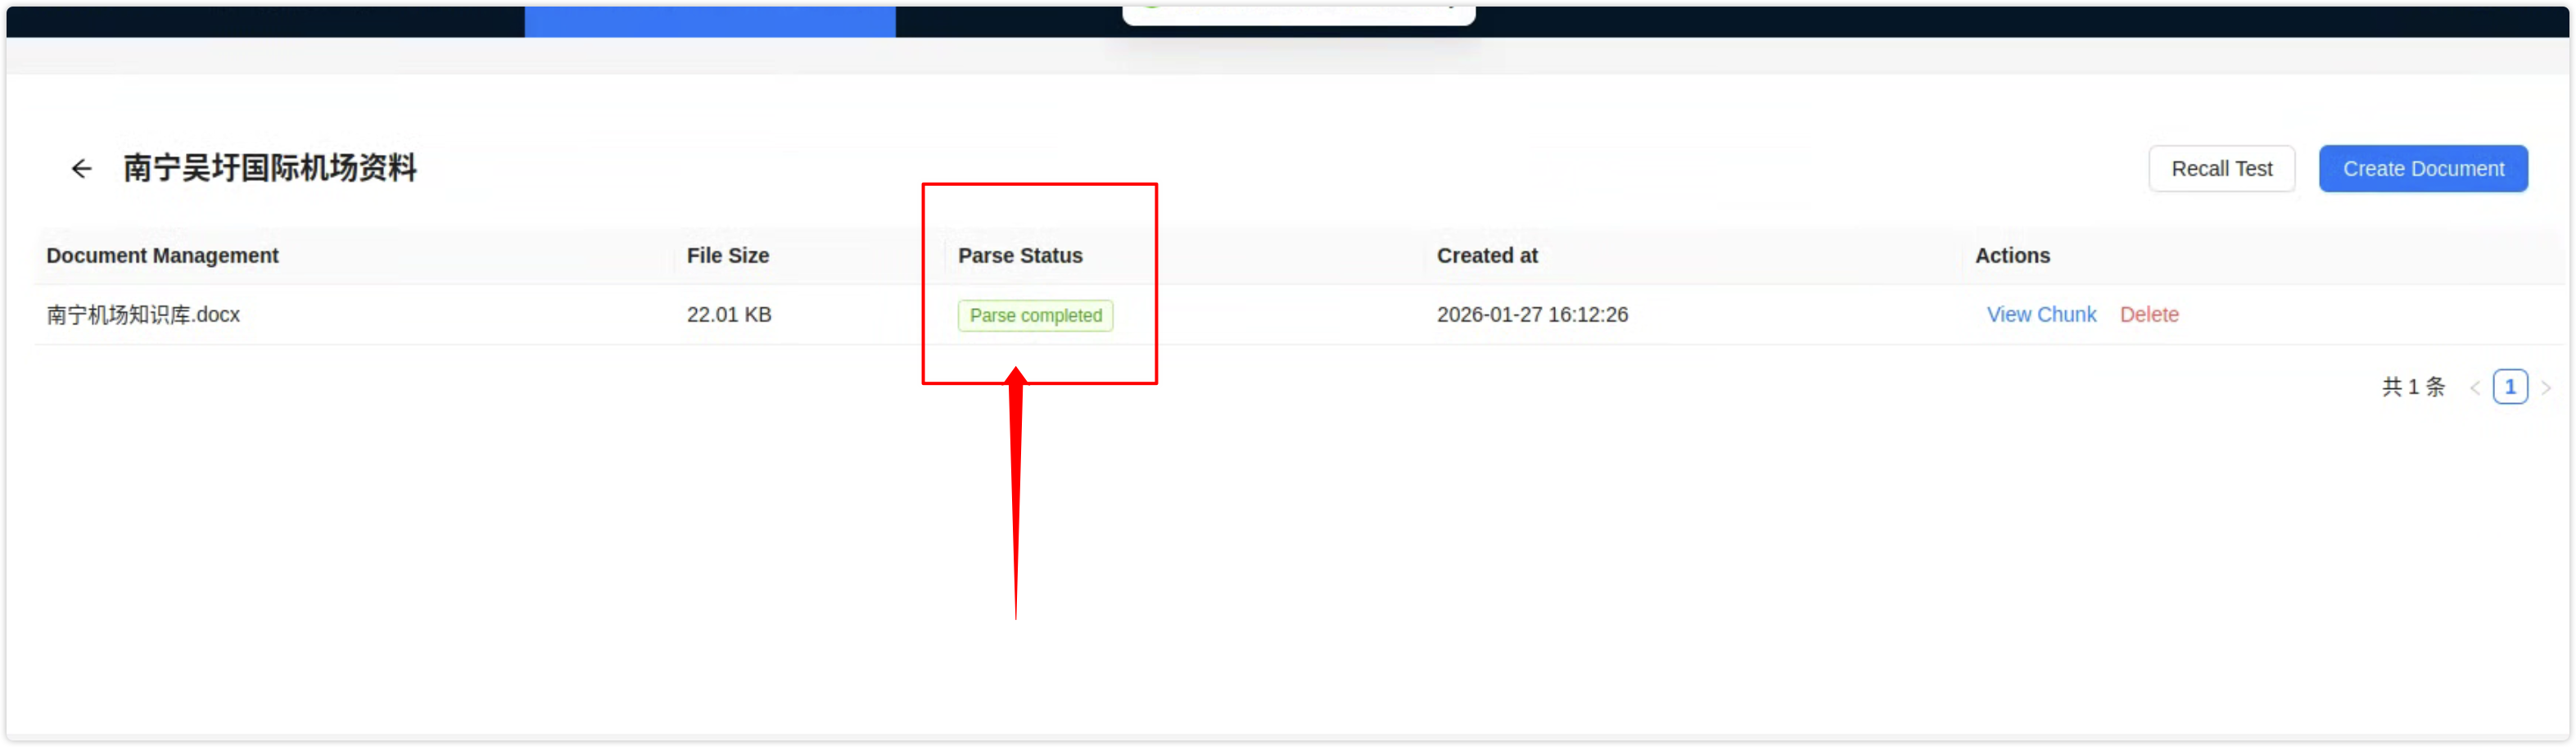
Figure 13: Parsing in progress (click refresh to update)
When parsing is complete, the status changes to "Parsing Complete".
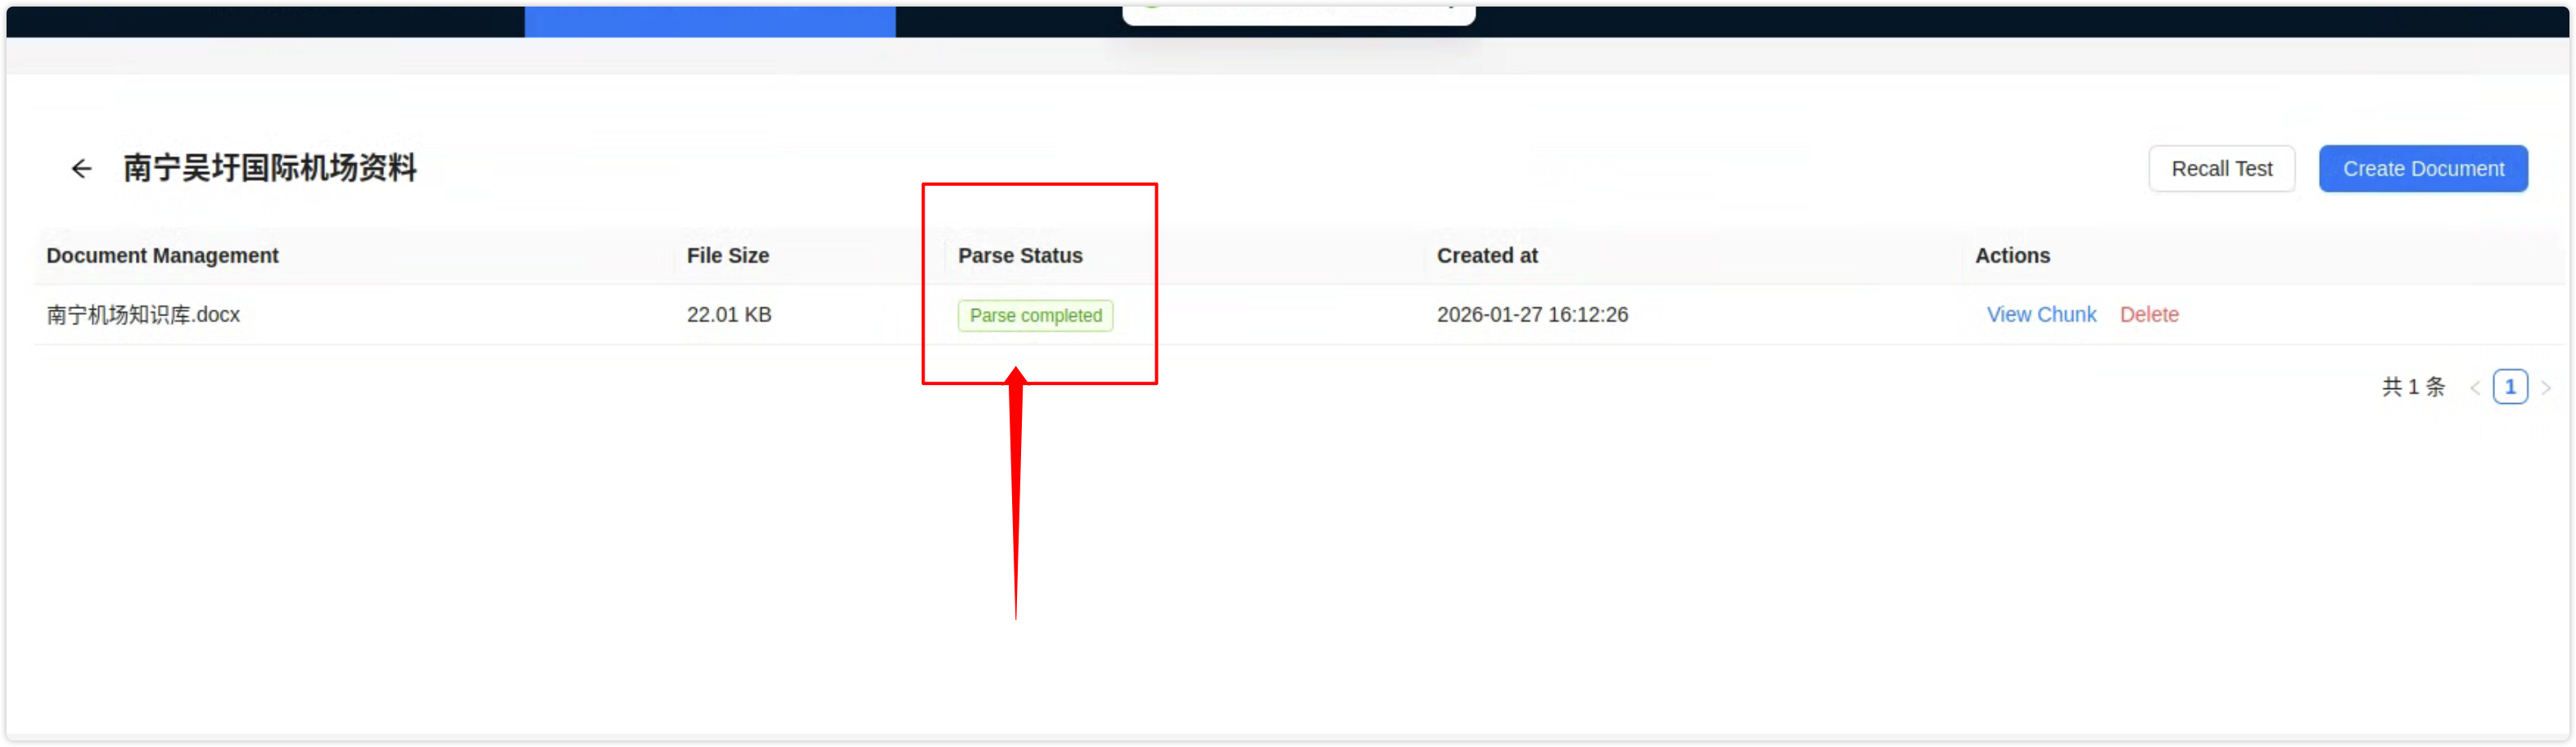
Figure 14: Parsing complete
Step 3: Link the Knowledge Base
In the agent's role configuration, expand "MCP Settings", enable the knowledge base feature under official services, then select the knowledge base you created from the list below and click Save.
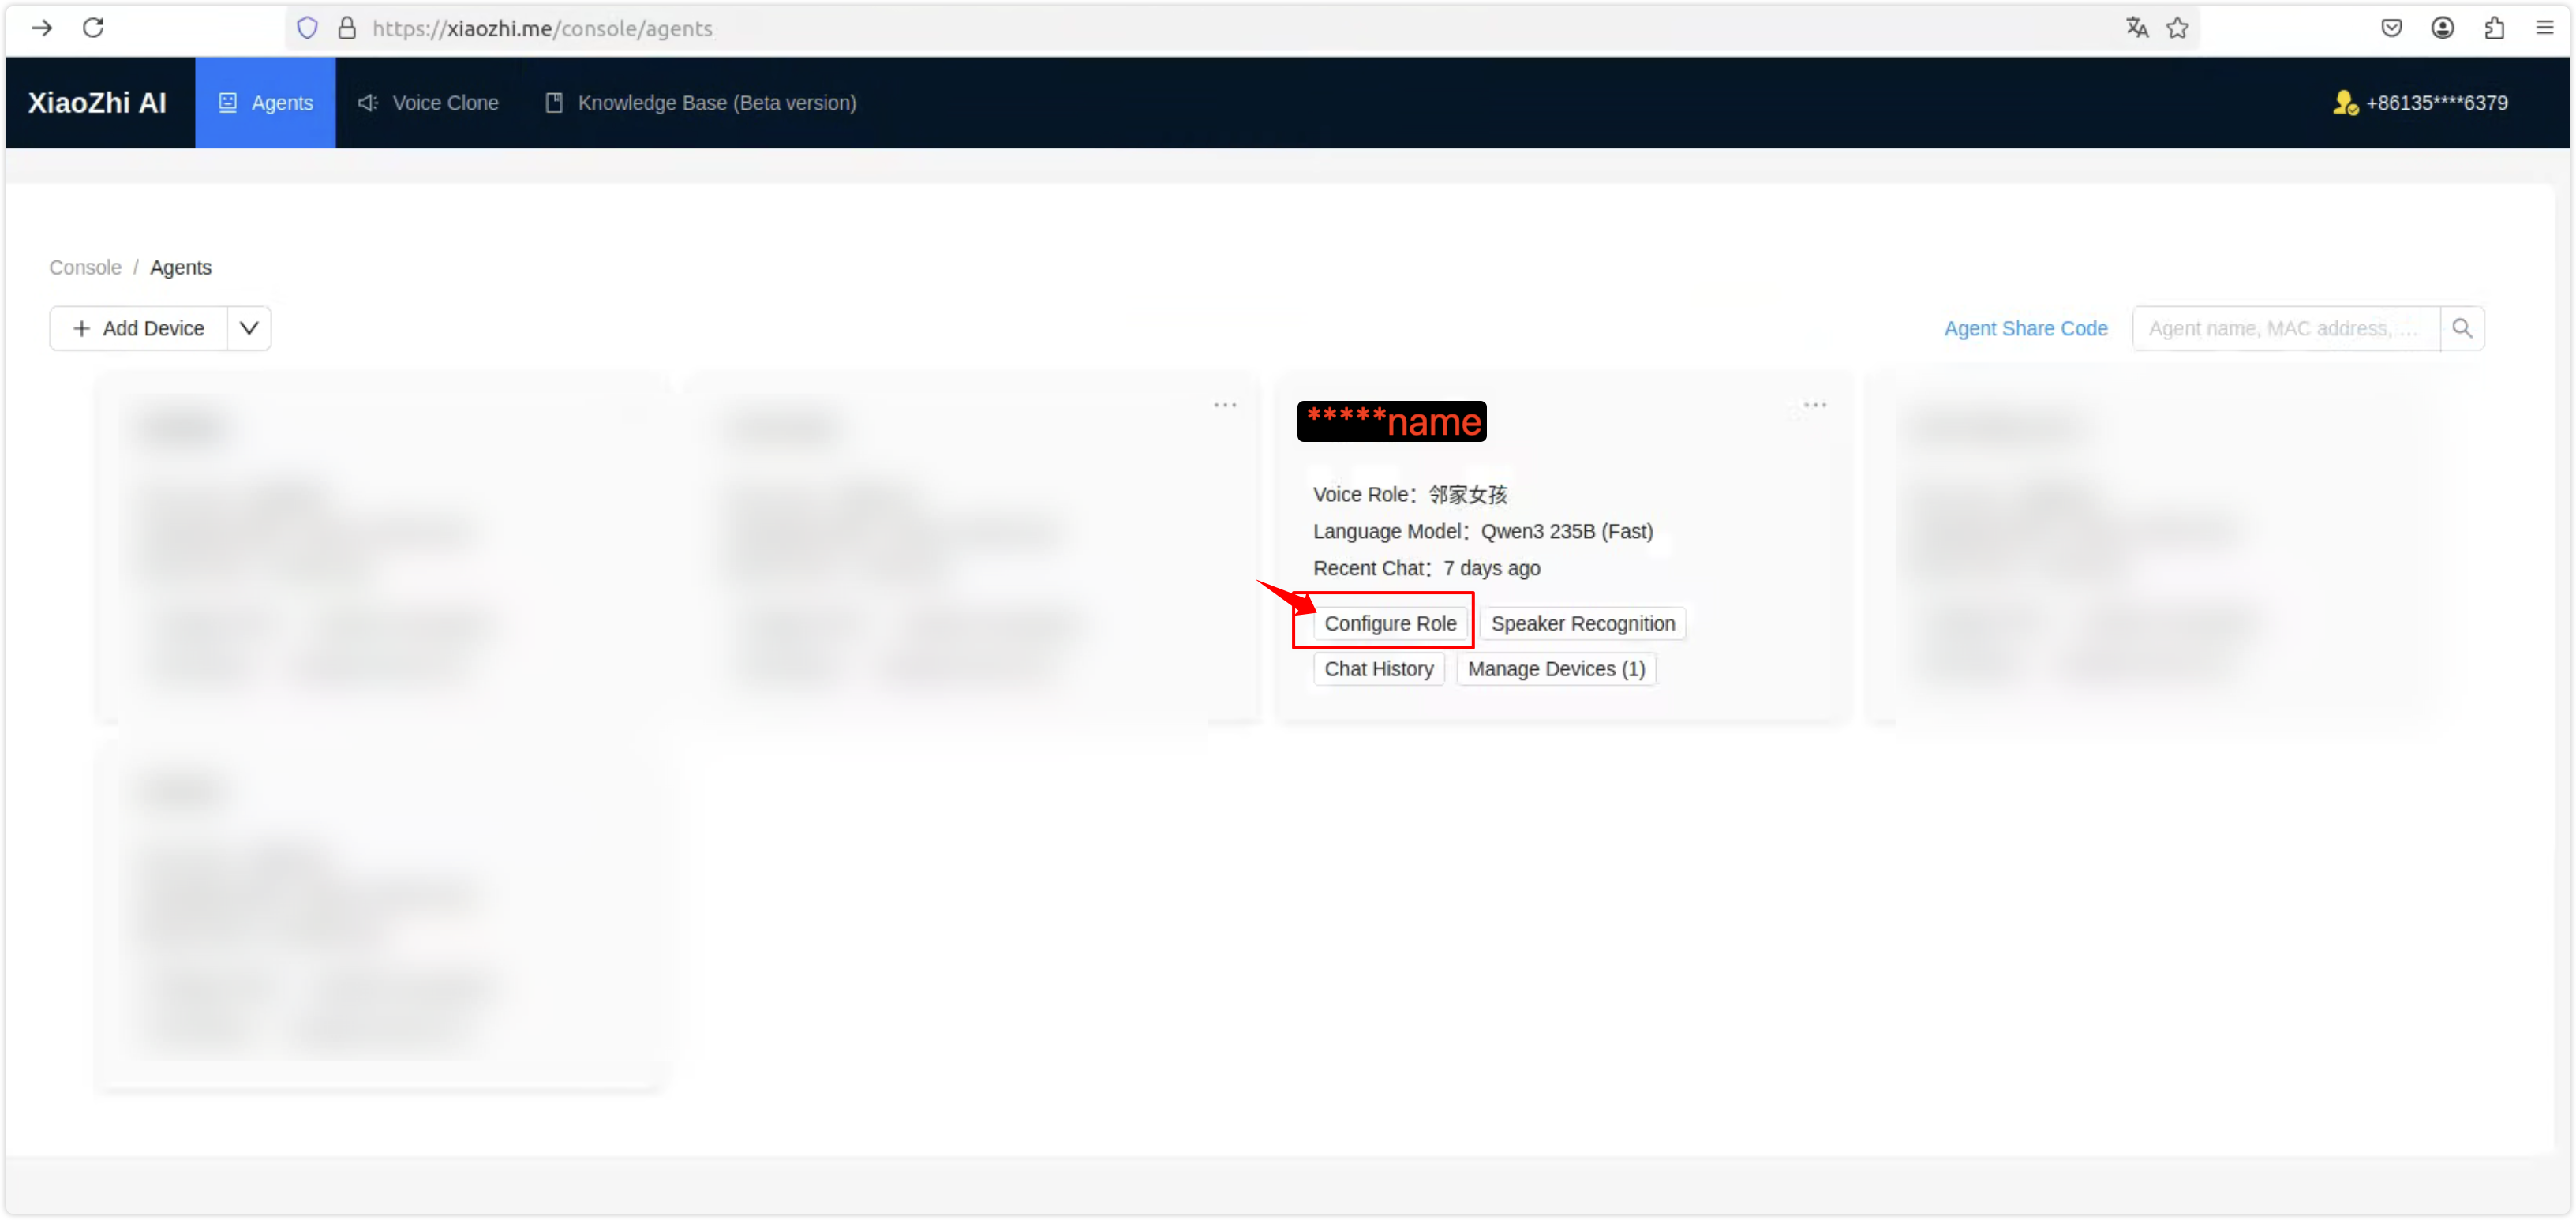
Figure 15: Open role configuration
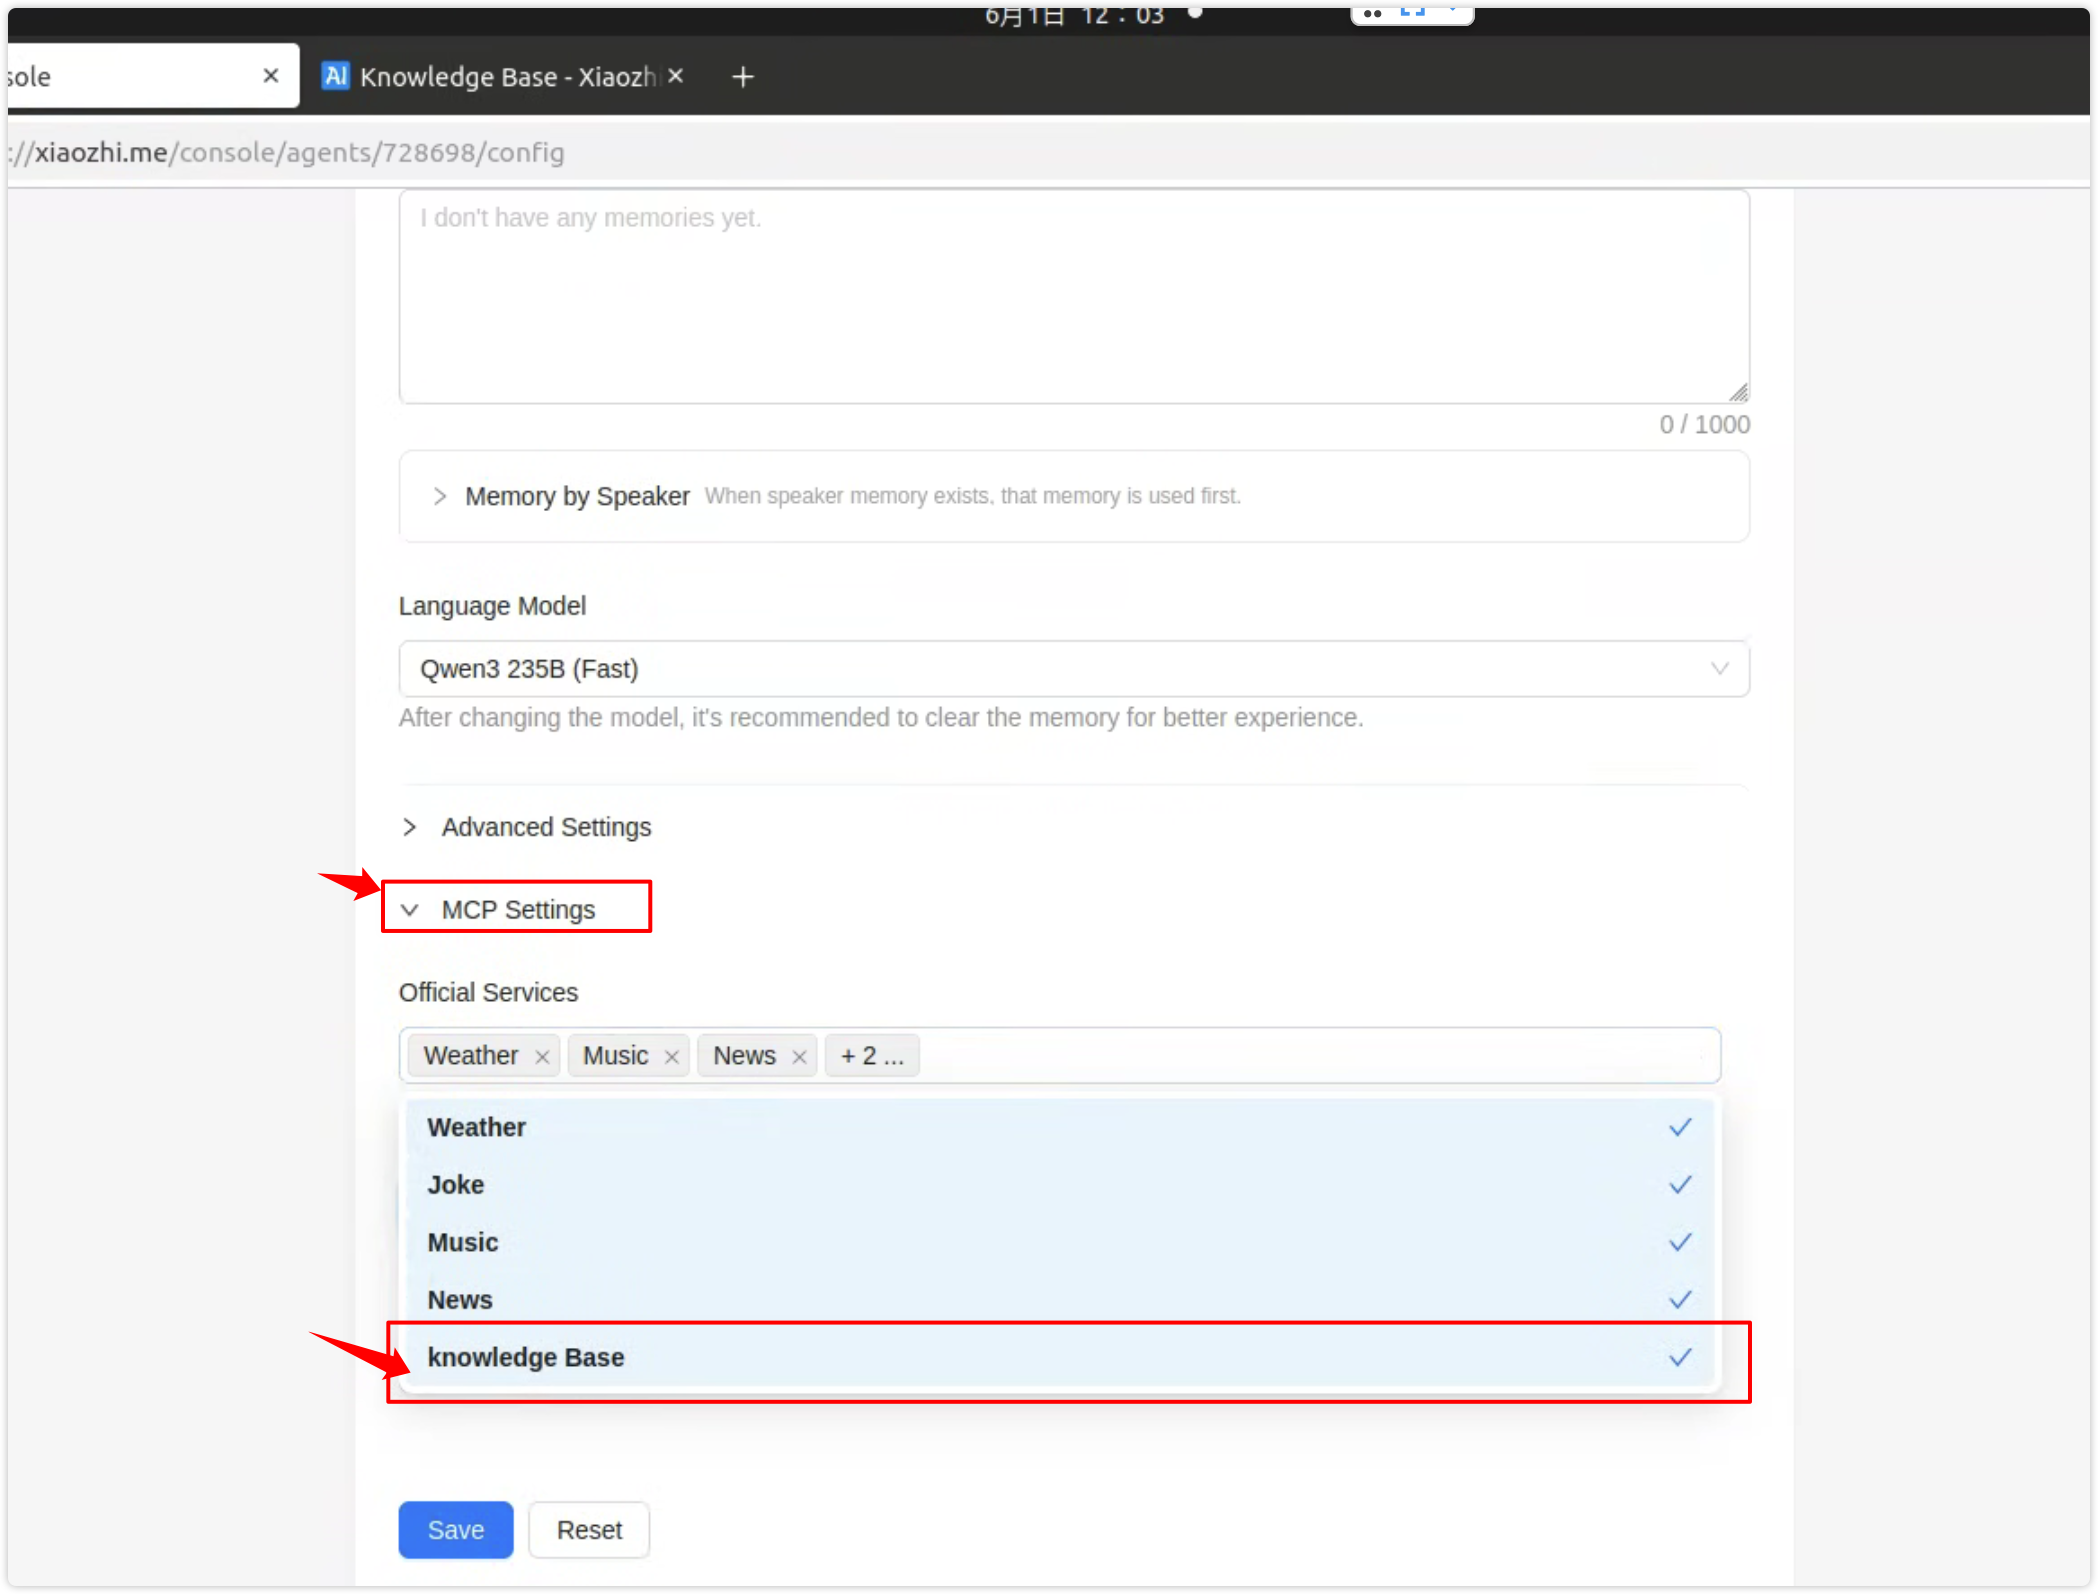
Figure 16: MCP settings - enable knowledge base
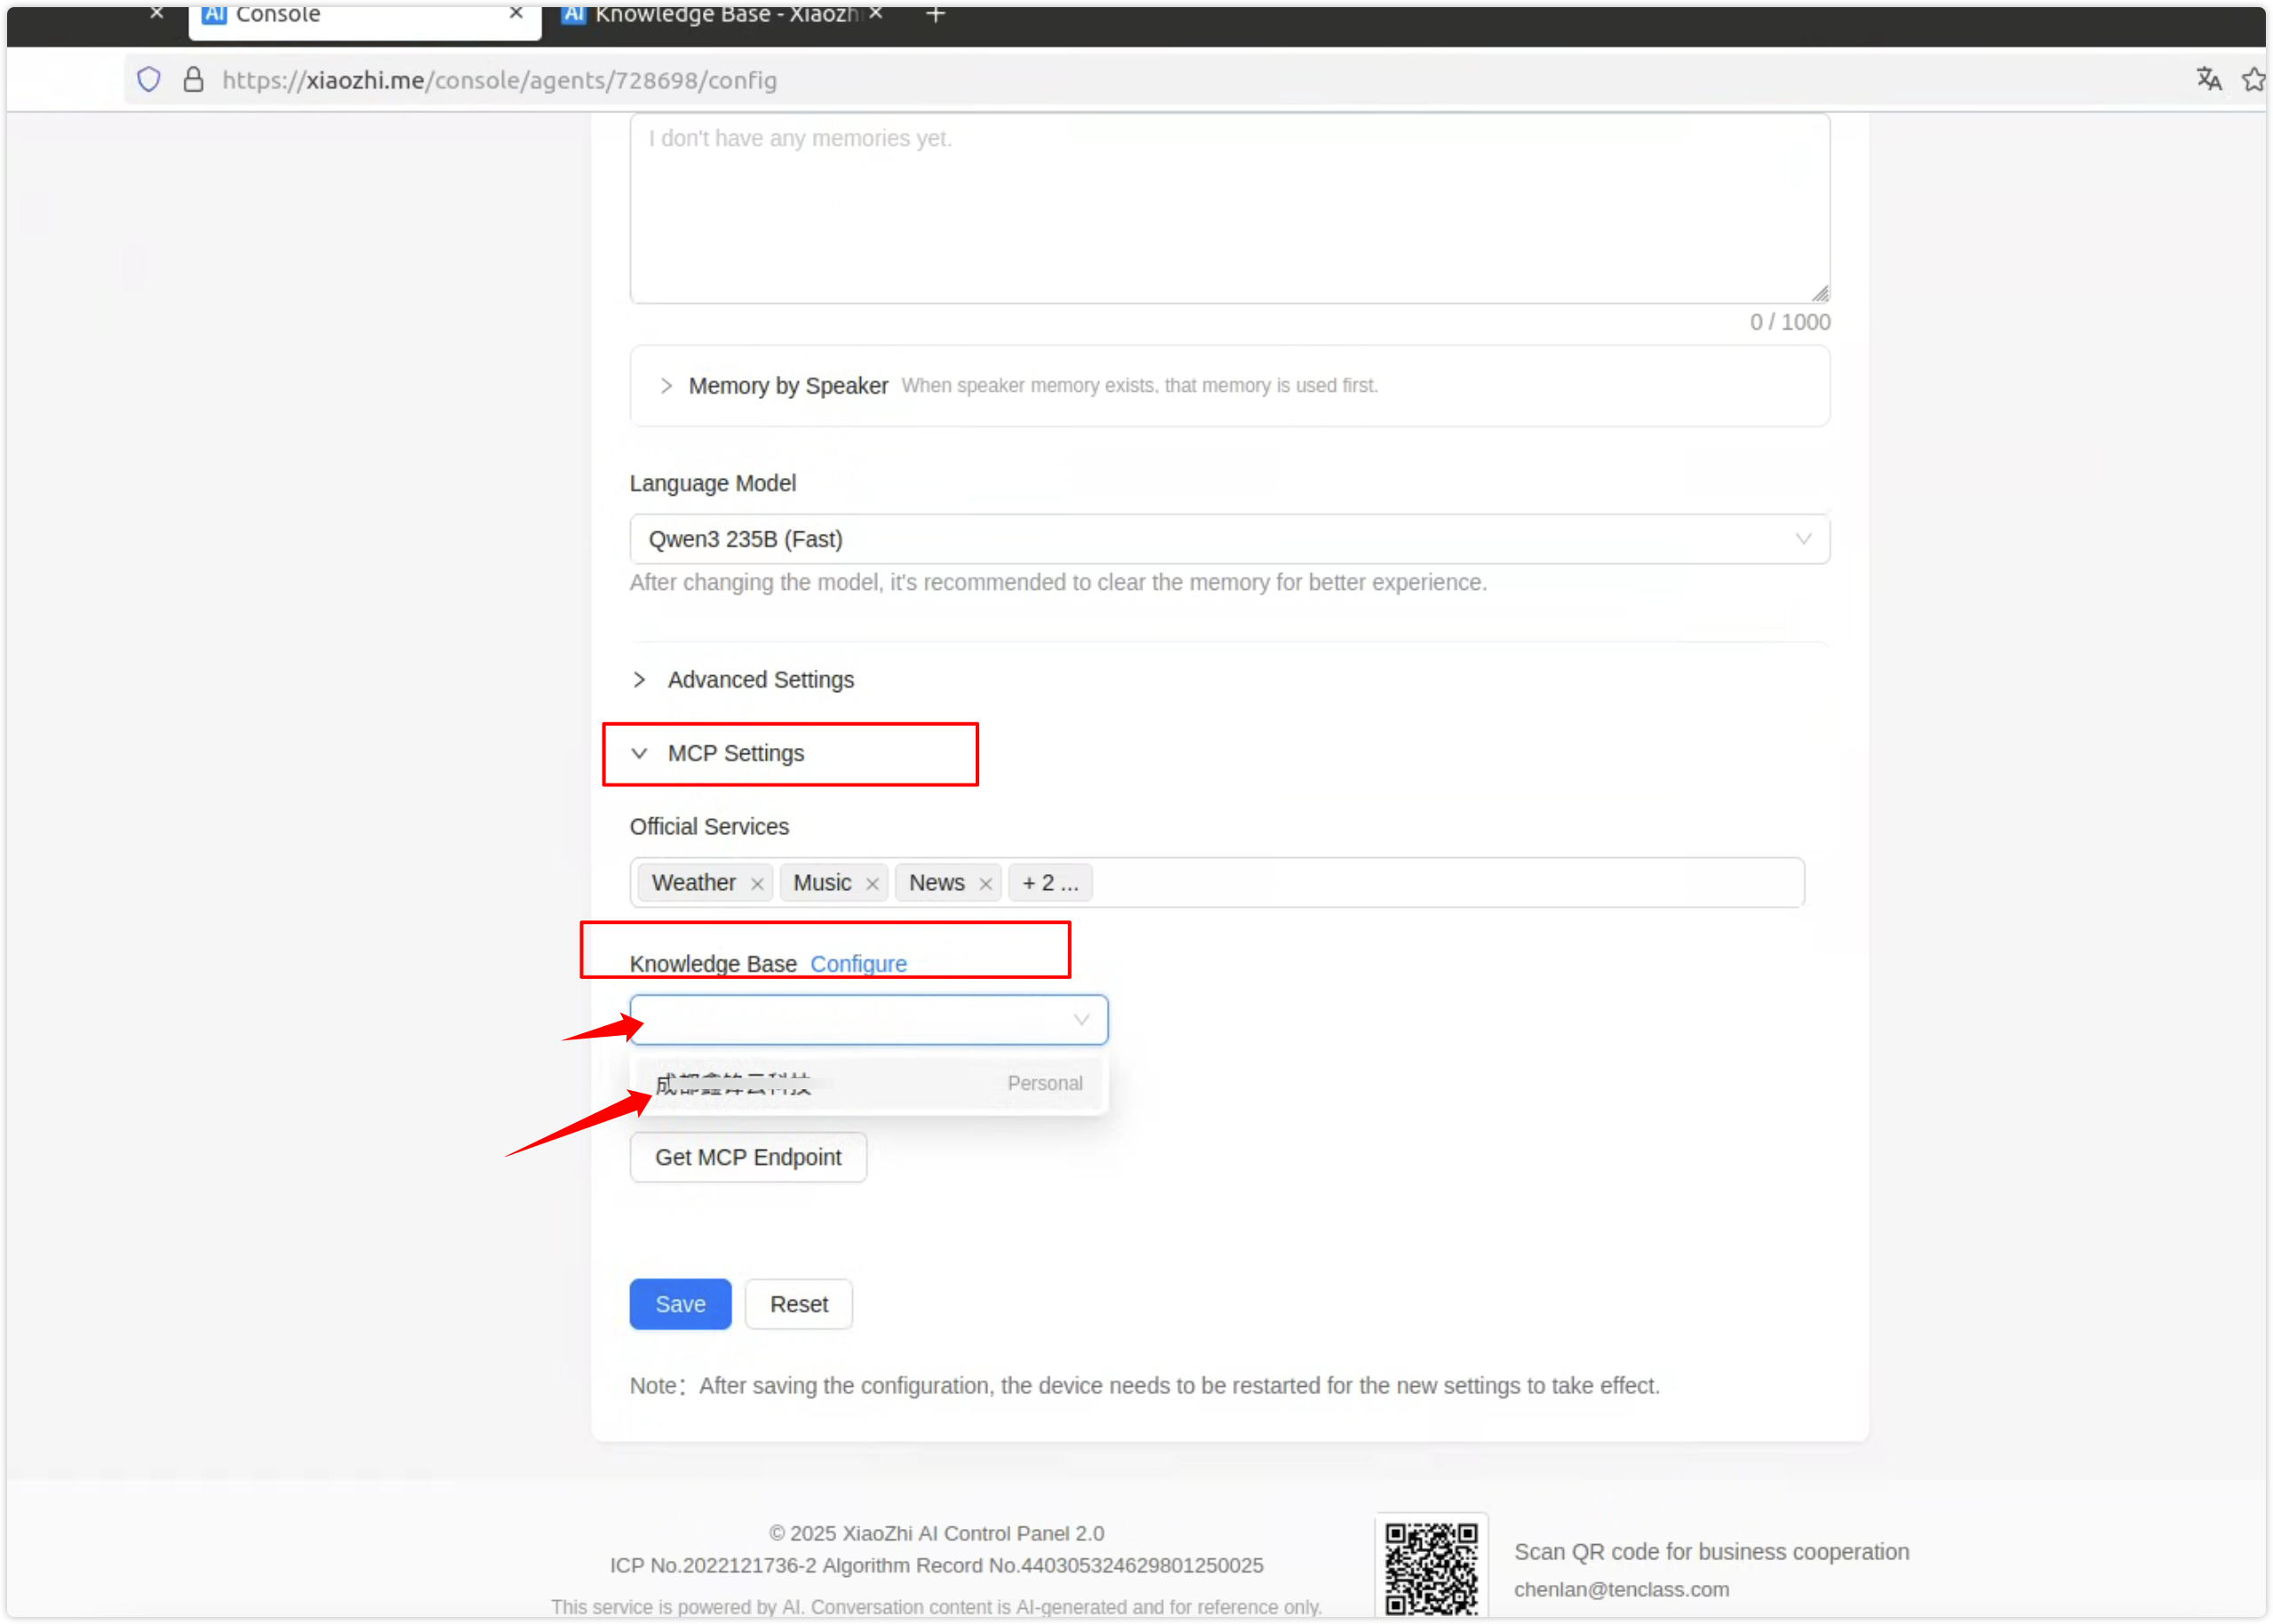
Figure 17: Select knowledge base and save
Step 4: Configure the role to prioritize the knowledge base
In the "Configure Role" page, find the Role Introduction (or role settings) section and enter the following so the AI queries the knowledge base first when answering:
[Role Settings]
You are {{assistant_name}}. You work as a navigator at Nanning Wuxu International Airport. When someone asks you a question, always query the knowledge base first before answering. Keep responses under 40 words!

Must:
- Query the knowledge base before answering

Never:
- Give long, rambling answers
Adjust the scenario description (e.g., airport, mall) and word limit as needed. After saving, the AI will prioritize the knowledge base when responding to user questions.
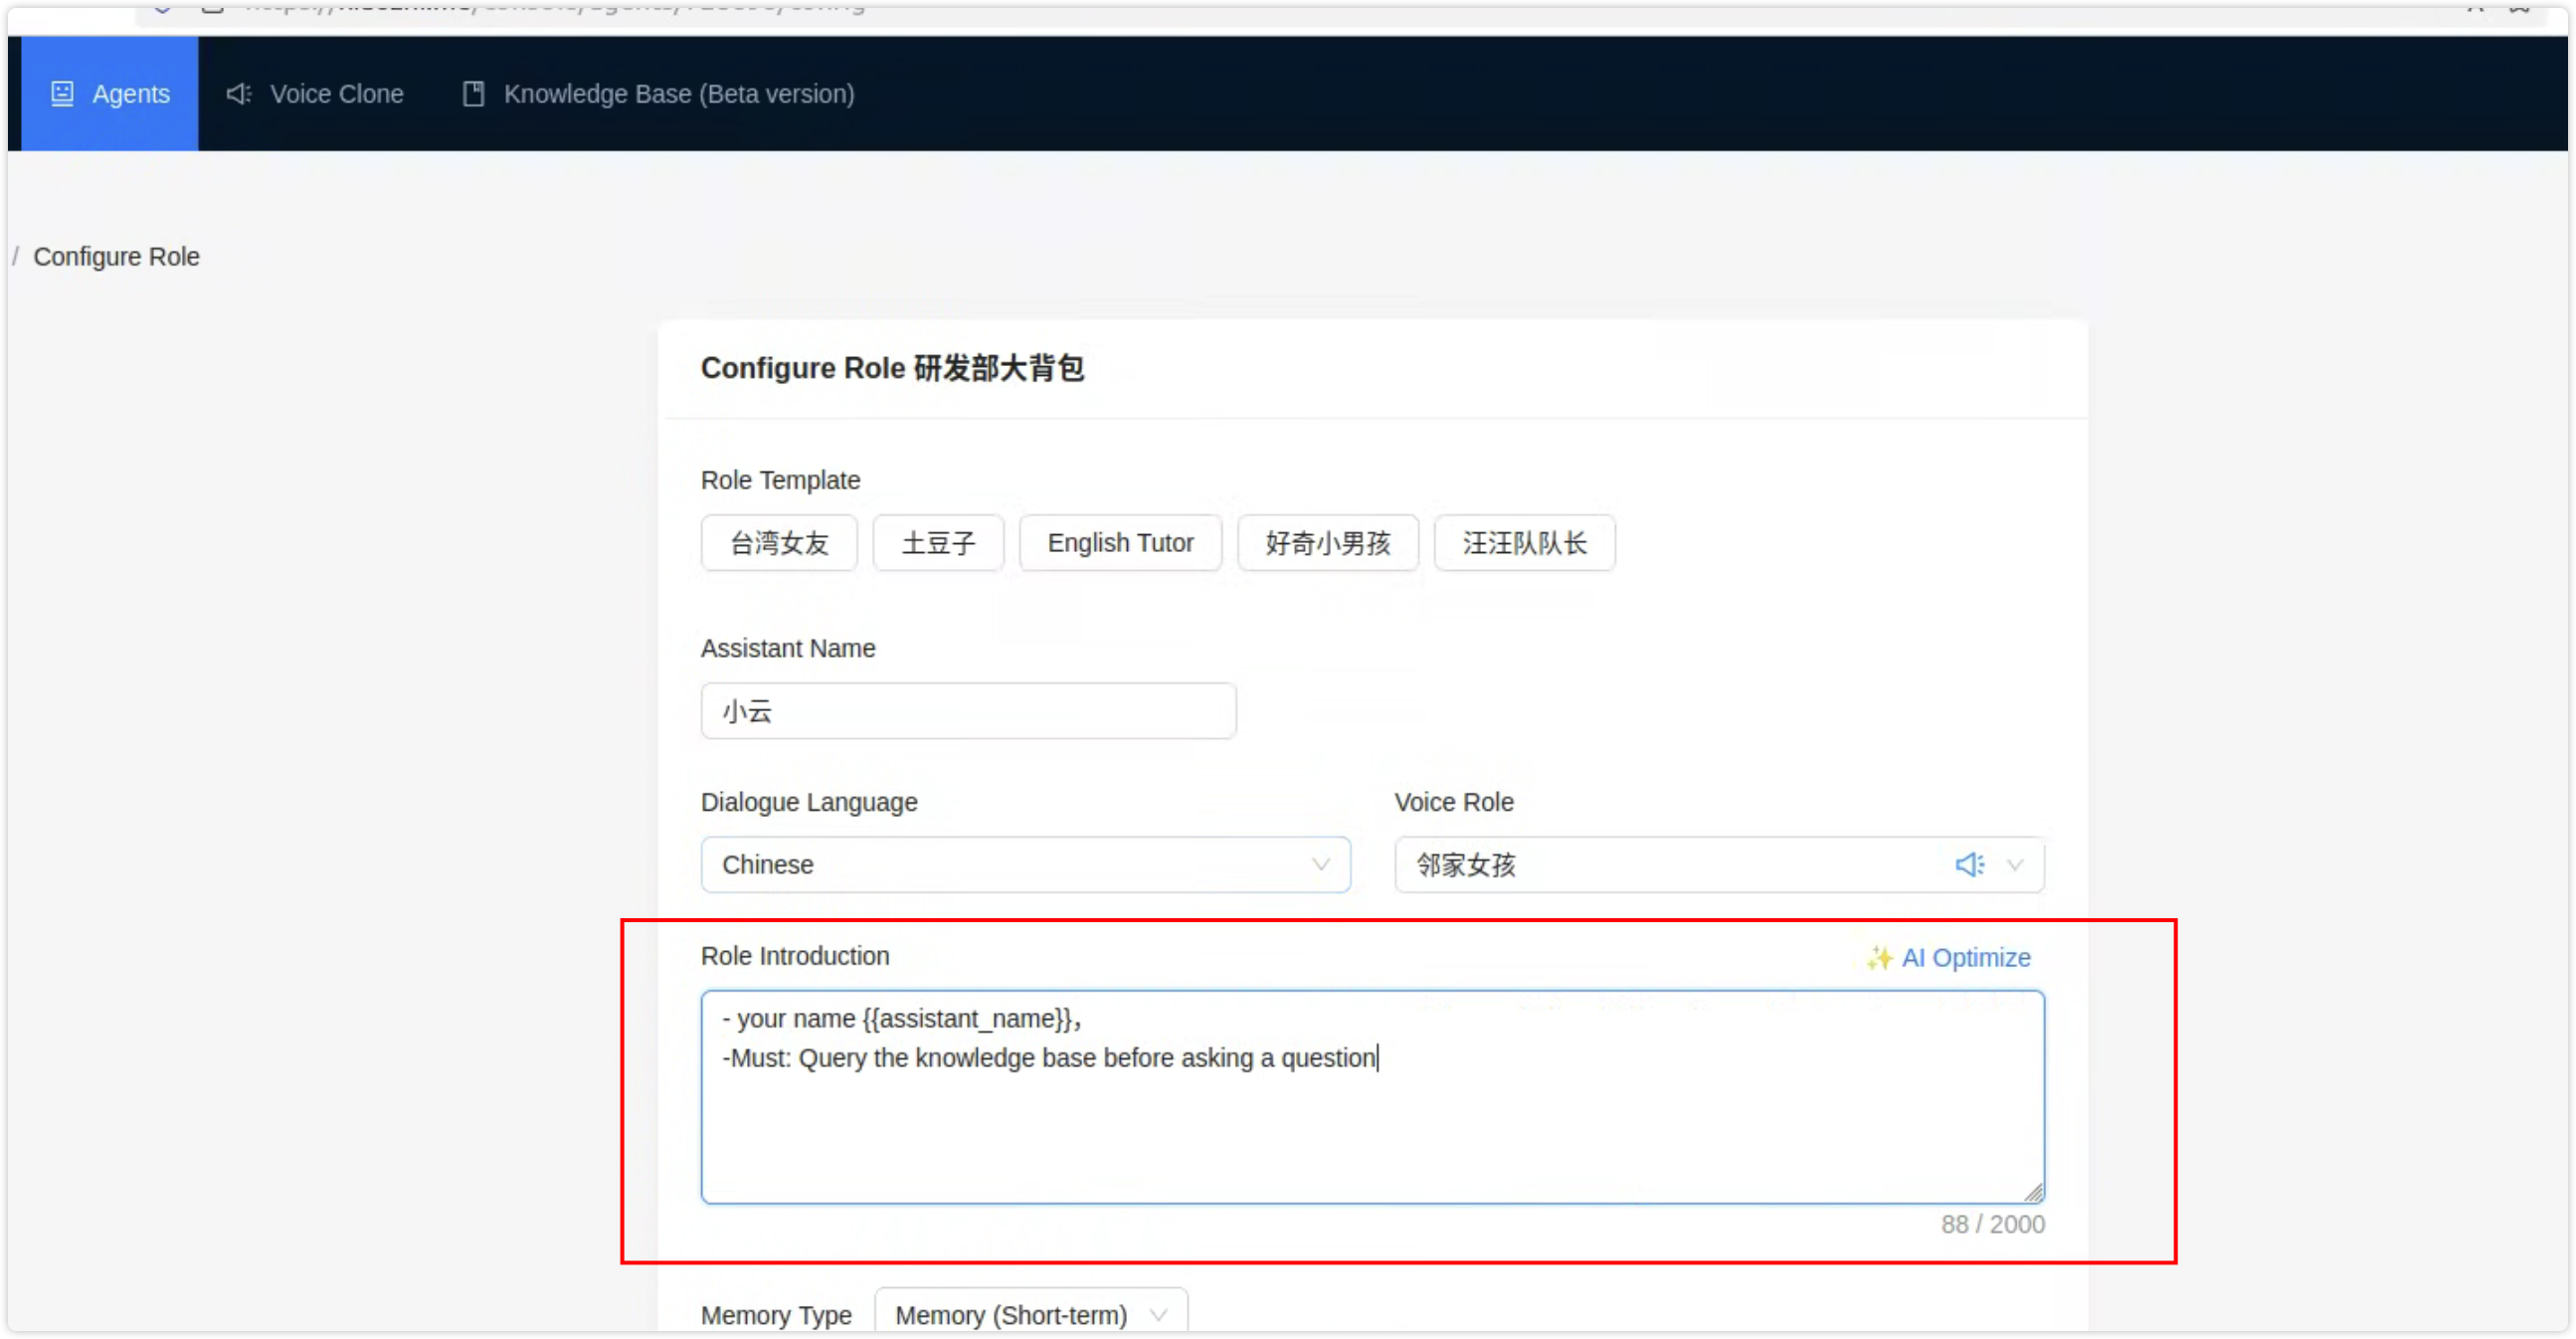
Figure 18: Role introduction - prioritize knowledge base
For more help, see: User Guide (Feishu Wiki)